A little over three weeks ago, I planted some radish and arugula seeds in the ground. With a little more sunshine and rain, those crops will be ready to harvest in a couple of weeks. They were the final seeds put in the garden for consumption in the 2014 growing season. They were not, however, the final seeds to be planted in the garden. In October, I sowed several rounds of cover crops in the garden. These “crops” aren’t meant to be consumed this year, but they serve an equally important role in the garden. Each time I finish harvesting a given crop in the field, any remaining plant material gets mowed down, then tilled shallowly so the debris can break down and rot into the soil. Most of the microorganisms that do the work of breaking down crops live in the top couple of inches of soil, and you certainly don’t want your micro-organisms, plant debris, and loose soil to wash away now that the soil lacks plant roots to keep it in place. Enter cover crops. Cover crops, as they are aptly named, cover the spaces in your garden that have opened up once you are done harvesting. On a huge farm, whole fields may sit in cover crop while others are used for growing crops for consumption, then they are switched back and forth each season. Because my farm is only an acre, I used every available inch to grow crops this year, but I will have cover crops do their work over the winter. Cover crops will survive cold and even frigid weather, and keep soil anchored through rainstorms, wind, and snow melt. In the spring, they will recommence growing and provide luxurious greens that can be mowed and tilled in to build the soil and provide organic fertilizer for the spring edible crops. This year, I have chosen to use a mix of plants to act as my cover crops.
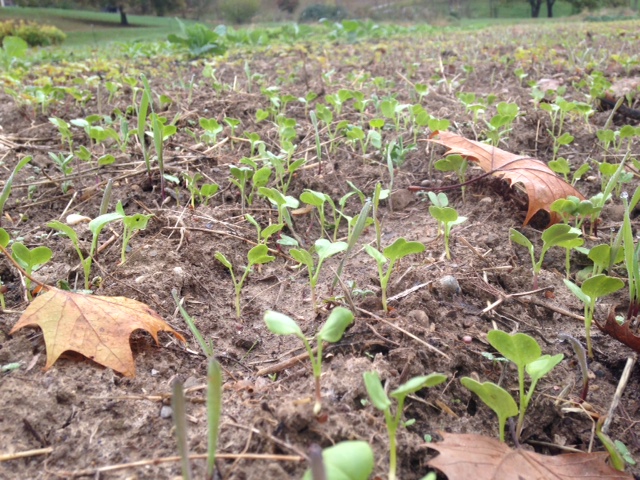
Sprouting baby cover crop plants, plant debris, and fall leaves – all will feed the soil!
Clover and Austrian Winter Peas are cold hardy legumes, plants that can take nitrogen from the air and fix it into the soil where it can act as a fertilizer. These plants will vine and spread to cover the surface of the ground. In the spring, they will make beautiful blossoms that will attract pollinators to the garden, and the tender tips of the pea plants can be eaten in salads or used in stir fry. Tillage radishes and brown-seeded mustard are both in the Brassica plant family and serve different purposes. Tillage radishes make long, skinny roots which will rot away in the spring and thereby help break up soil compaction and allow air and water percolation through the soil. The brown-seeded mustard plants will make edible greens in the spring, but they will also send up large stalks that will provide vertical structure for the peas to climb. The seed from these plants can be harvested to made spicy brown mustard! Winter rye is the most cold tolerant plant in my cover crop mix, and even if we get another frigid winter this year, it will survive and grow again in the spring to provide lots of biomass that will be cut down and added back to the soil. Over the winter, its deep roots will keep the soil in place. Buckwheat is a plant that is often grown as a summer cover crop because it grows rapidly in the heat and is quite sensitive to cold and frost. I had some buckwheat seed laying around and I sowed it in with my fall cover crops. I know it will die back soon, maybe even tonight with our first freeze, but in the meantime it has grown quickly and is no doubt helping keep the soil in place. It will die off just as the cool-loving crops want more space to spread out. Finally, there are a lot of volunteer cover crops doing their work out in the garden. Some people might call these plants weeds, but I look at them as a free cover crop. Mostly I see henbit or purple dead nettle (I have a hard time telling them apart when they’re little) just starting to leaf out. These are low-growing plants that will act as nurse crops, filling in the spaces between the intentional cover crops. What I’m hoping for this winter is a lush, green carpet to cover the bare soil. In the spring, I look for the green carpet to give rise to a beautiful stand of plants with low growing vines, lots of vertical structure, and flowers aplenty. At the moment, our green cover crop carpet is well underway, and with the rain we have been receiving for the past week, it is glowing and growing before my eyes. These plants are happy to be out in the cool weather and are saying, “bring it on!” to the winter. So am I.
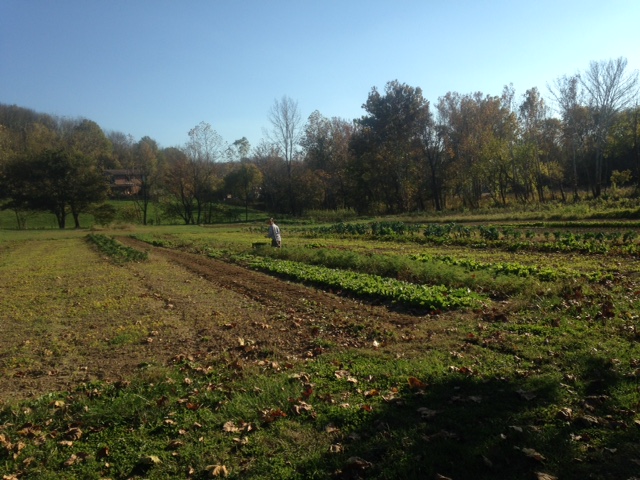
Chris picking carrots. The bright yellow-green patches to his left and right are our baby cover crops getting established and covering bare soil in the garden.
My friend, Morgan, had Chris and me over for dinner last night, and she put in a special request that we bring over some heirloom tomatoes. I was happy to oblige; we have plenty of them at the moment, and we are excited to share them with our friends and family. I brought over several varieties and we taste tested at least three, all of which where juicy, dense, and sweet. Morg asked, “Why do heirlooms taste so much better?” and I thought y’all might have the same question, so here’s my answer in several parts:
Let’s start by discussing just what the heck makes a tomato (or any other vegetable, for that matter), an “heirloom.” Do any of you have an old piece of jewelry or antique passed down through your family? When I turned 15, my aunt, Jennifer, gave me a little gold ring that she had received on her 15th birthday from my great grandmother, Mutzi. In turn, Mutzi had received the ring on her 15th birthday from her father. That’s an heirloom. Something that has been passed down over the years through the generations of a family. Now, let’s shift the gears and talk about heirloom vegetables. In the days before seed catalogs, folks would save seeds from the myriad vegetables they were growing for fresh eating and preserving, and plant those saved seeds in subsequent year. In fact, a family could save the seed from their best, most flavorful, most vigorous and healthy plants, and by doing that every year, improve their vegetables’ taste, texture, and production at that specific location. Let’s fast forward to what agriculture looks like today. We now live in a world where vegetable production has converted from diverse backyard gardens to large-scale monocultures, meaning vast acreages of one crop, often picked by a machine instead of by a human hand. We also live in a world where we seldom walk out the back door, pick our vegetables, and eat them immediately. Instead, we go to the grocery store and buy vegetables that were picked at an unknown date, packed, and shipped some unknown number of miles away. For a vegetable to be “successful” in today’s agricultural world, it must maximize production per acre, be easy to pick by a machine, be easily washed and packed, resist bruising during shipping, sit stably on a shelf for an untold amount of time, be uniform in color, shape, and size so it displays nicely, and last for weeks in your refrigerator’s vegetable drawer. So, instead of seed that has been saved by families for flavor, ripeness, and vigor in a specific location, we now eat vegetables from seeds that were saved for uniformity, hardness (for shipping purposes), and shelf stability. Note that I did not include “flavor” in that list. To achieve these modern goals, people have done crazy things to seeds, including inserting genetic material from other life forms into the DNA of vegetables, making them genetically modified organisms, or GMOs.
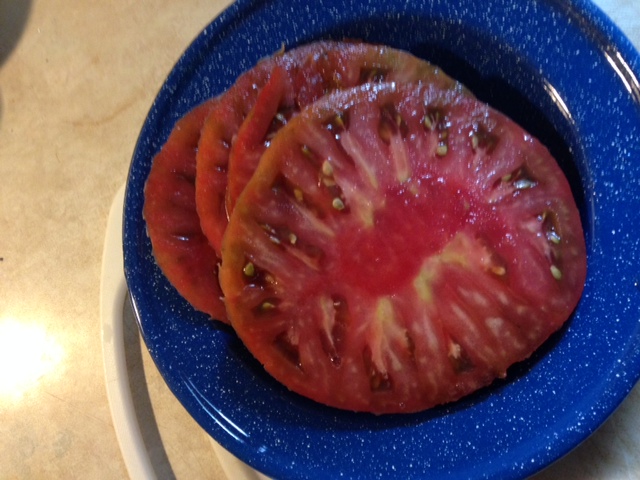
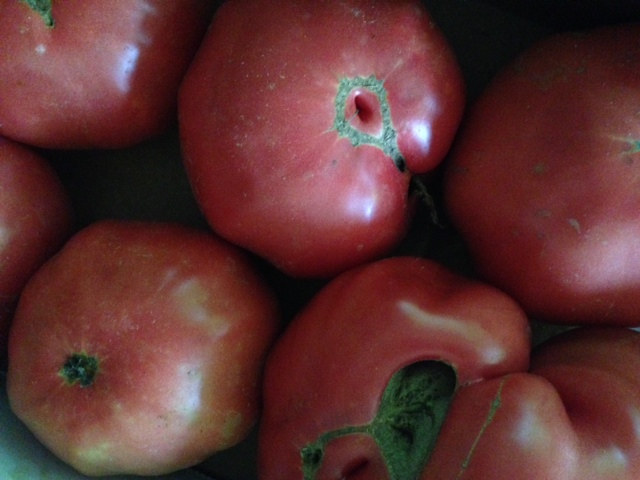
A meaty, juicy Cherokee Purple tomato, a Tennessee heirloom, likely of Cherokee Indian origin. One slice will fill your bowl!
Most vegetables develop flavor as they approach ripeness. This is especially the case with tomatoes. Ever eat one of those hard, white-in-the-center, tomatoes from the grocery store in January? They have absolutely no flavor because they were picked under-ripe to keep them hard for shipping. A tomato that is allowed to ripen on the vine has time to develop sugars, which cause the tomato to be soft to the touch, juicy when cut, fragrant, and sweet. The sugars also cause the tomato to rapidly decay and soften if you don’t eat them shortly after they are picked. A soft, sugary tomato does NOT travel well, and it certainly doesn’t travel well over thousands of miles. Really, the only way to get your hands on one of these babies is to grow them and pick them yourself or to buy them from someone growing them nearby. This is where your friendly, small-scale farmer comes into play. Small-scale farmers can pick tomatoes by hand, noting which are at their peak of ripeness, handle them gently, and deliver them to a market or to your doorstep in a short amount of time. Small-scale farmers can peddle even the ugliest of tomatoes, including cracked and crazy-looking tomatoes (as heirlooms often are), because they can talk with their customer one-on-one, describe the flavor, describe their growing practices, let you smell, touch, and even taste test the vegetables. Farmers that grow for wholesale simply can’t do this.
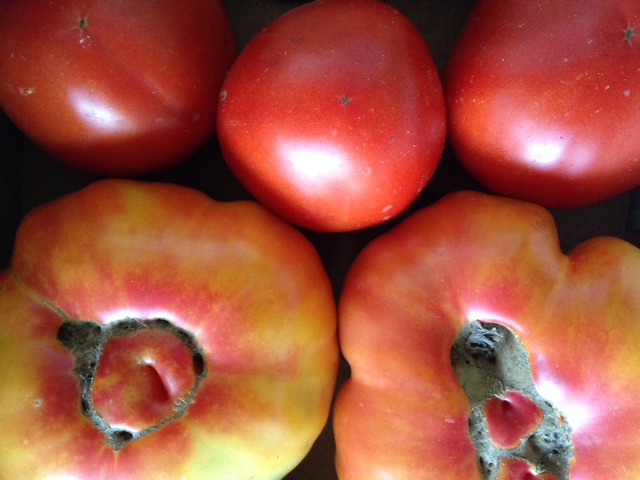
Huge, gnarly-looking pink-and-yellow Williams Striped tomatoes, an heirloom variety from Kentucky
While I do have my great grandma’s heirloom ring, I don’t have any heirloom seeds that were passed down in my family. Luckily, there are a lot of small-scale growers out there, dutifully saving seeds from old heirloom varieties and sharing them with other farmers. This year, I ordered most of my seeds from Fedco, a seed co-op based in Maine, and Southern Exposure Seed Exchange, which is a network of growers that specialize in varieties that grow well in the Mid-Atlantic and Southeastern US. Through the hard work of these growers, many heirloom varieties live on and are available for growers like me – new farmers just getting started and in need of delicious locally-adapted varieties to grow for their friends, family, and neighbors.
Granny Cantrell’s German Pink, an heirloom variety grown by Lettie Cantrell of West Liberty, KY
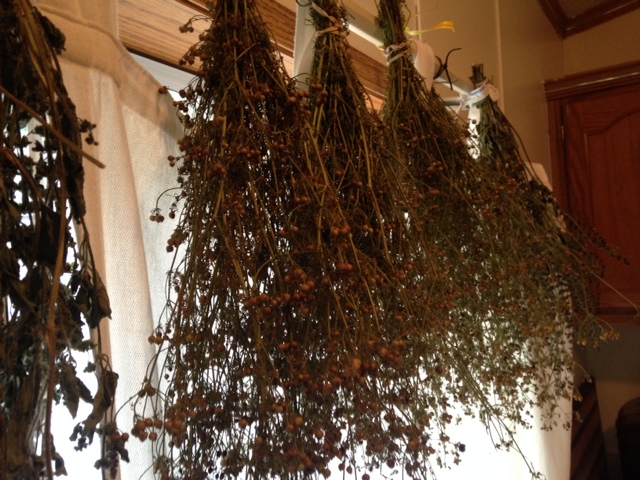
I spend a lot of time sharing news about the farm and the farming process, but I haven’t been too good about sharing homesteading stories. Part of the reason I decided to become a farmer and live on my farm is because I like growing and preserving my own food. Mainly because I love to eat and eat well. When I first moved onto the farm this winter, I decided to try tapping some of the maple trees on the property to make my own maple syrup. I ended up tapping three trees and got enough syrup to keep my pancakes topped throughout the year, with a few jars of syrup to spare to give as gifts to my family. Currently, the veggies and fruit are rolling in, and it seems like I can’t find enough spare time to do all the canning I’d like. Plus, my gas stove heats the kitchen up sooo much that I’ve convinced myself I’ll do all my pickling and canning when the fall comes and I can use the extra heat in the kitchen. For now, most of the food preservation I have been doing involves drying herbs. I can deal with the heat that the dehydrator puts off, plus I’ve been passively drying a bunch of herbs by hanging them upside down from a curtain rod in the kitchen. Any extra bunches of basil, tulsi, and coriander that I bring home from the market go right up on the “drying rod” until they are crispy dry, then I strip the leaves or seeds off the bunches and store them in a dry mason jar. It makes me excited for spices and tea this winter when my garden is under lots of snow.
Herbs drying in the kitchen
Earlier this week, I harvested a crop of mustard seeds from the garden. In April, I planted white mustard, Sinapis alba, which is used to make the table mustard we’re all used to eating. Your basic mustard comes from grinding down the seeds of this plant, and adding it to water, vinegar, or other liquids and spices. For example, dijon mustard typically includes white wine as one of the liquids. Additionally, the super yellow color we normally associate with mustard comes from the addition of turmeric, although I’m sure a lot of cheap store-bought mustard just uses food dyes these days. You can also use seeds from other mustard plants to make different kinds of mustard. In the past, I have grown brown mustard, Brassica juncea, and used it to make spicy brown mustard.
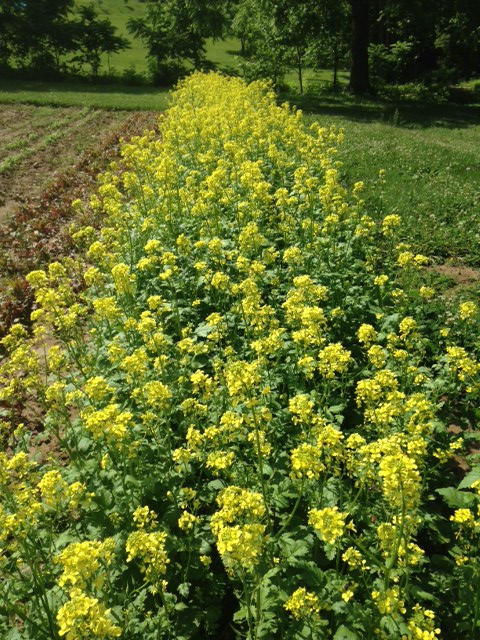
After the initial April planting of white mustard, the plants grew quite quickly and were in full flower by the end of May. And, boy, did the bugs love those flowers. It was a veritable bug orgy down there in the mustard patch.
The mustard patch in full bloom in May
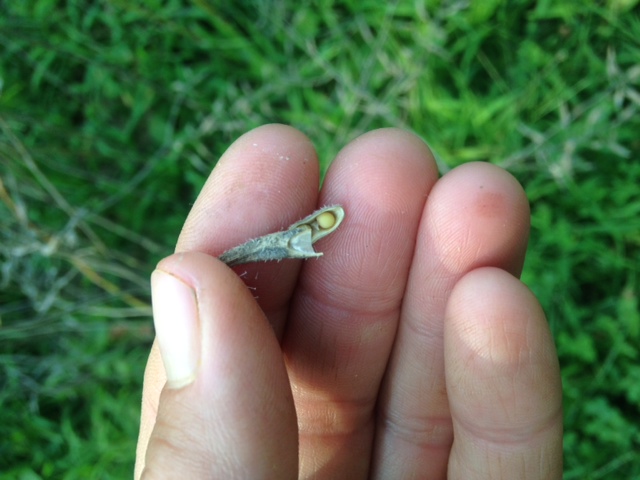
Slowly, the flowers turned into green seed pods that plumped up and filled with green seeds. Then, the seed pods began to dry up, turn brown, and the seeds inside turned from green to tan/yellow. A few days ago, while the weather was dry, I decided that the majority of the mustard plants were dry enough, and that I should harvest them before they shattered, which happens when the plant gets so dry that the pods burst open and spew their seeds all over the ground.
The mustard flowers become seed pods and dry up
Each dry seed pod contains a few mustard seeds
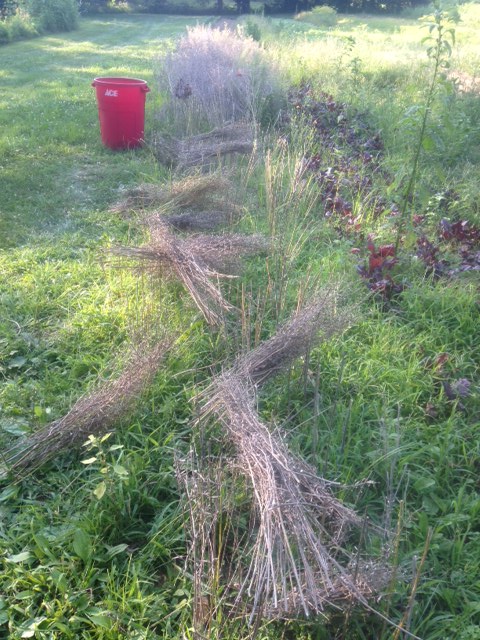
To harvest the seed, I cut down handfuls of the plants, and shook them into a large, clean garbage can, causing the seed pods to shatter and release their seeds. This process is called threshing. It took me 2 hours to thresh 250 square feet of densely growing mustard. A mechanical harvester would be a whole lot quicker, but I don’t have a mechanical harvester, and I enjoy spending time in the garden doing repetitive work. It lets me relax, listen to the birds, and let my thoughts wander. At the end of the two hours, I had a can of mustard seeds and shattered seed pods, and I left the remains of the mustard plants, or “straw”, behind to compost back into the soil.
The red garbage can I used for threshing the mustard seed and leftover “mustard straw”
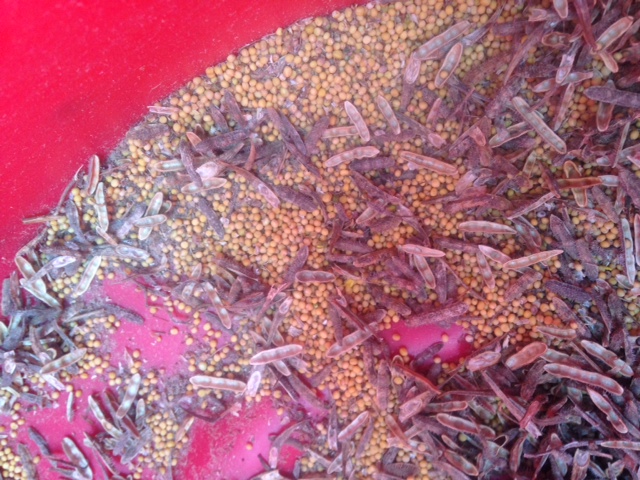
Mustard seed and shattered seed pods in the bottom of the garbage can
When I finished the threshing process, I brought my garbage can of seeds and pods to my kitchen and sifted it all through a strainer to separate out the seeds from the pods. There is still a little bit of chaff, or non-seed material, in with the seeds, so on the next low humidity day, I will take them outside with a fan and pour the seeds into a bucket in front of the fan to let the lightweight chaff blow off. All in all, I will have around 4 lbs of mustard seed, which I will use to make mustard, spice up dishes, and to make my new favorite condiment, pickled mustard seed, or “mustard caviar.” It’s a whole lot more work than buying mustard at the store, but at the end of the day, I love that my mustard will be homegrown, and the mustard patch was a huge benefit to the garden. It provided habitat for all kinds of beneficial insects during the flowering stage, its straw will help feed the soil, and because it was such a dense stand of tall plant material, it helped to keep weeds from sprouting underneath. Also, recent research has shown that growing mustard as a cover crop helps to fend off some of the pest insects and nematodes that live in the soil. All of that is wonderful, but honestly, I’m most excited about tasting my homemade mustard because, like I said, I love to eat.