Curing, Storing

With only two days of August left, we have entered a new phase at the farm: bulk harvesting.  To this point in the season, everything that we bring to the market has been picked fresh with the exception of potatoes, which we normally dig less than a week before the market, wash, dry, and let cure for 1-3 days.  Today, things changed.  We began harvesting our winter squash (pie pumpkins, butternut, delicata, and acorn squash), which we will now let cure before we begin bringing them to the market.  Next up will be storage onions, which also need time to cure before they can come to the market.  Before too long, we will have beans to pick, dry, shell, and store.  Then come sweet potatoes and two varieties of potato that we still have left out in the field.

Storage vegetables all require different conditions for curing, which is the process of toughening up the skin so the vegetables aren’t susceptible to invasion by rotting organisms like mold, fungus, and bacteria.  After the vegetables have cured, they want different conditions for storage so they remain in a stable condition until you’re ready to eat them.  Curing and storing vegetables can be tricky, especially if you don’t have large, well-ventilated climate controlled areas, so a new farmer like me has to make the best use of the spaces that we’ve got.  Winter squash, once they are picked ripe off of their vine, want to sit in a well-ventilated area that is warm (70-80 degrees F). This allows the stem of the squash to dry up and the skin to thicken, creating a nice sealed exterior impenetrable to rot organisms.  If the squash isn’t nicked or bruised, it can survive a very long time, sometimes all through the winter and into the spring!  I don’t have a space right now that can provide these conditions for hundreds of pounds of winter squash, so my best alternative is to put them in a greenhouse.  While the greenhouse is currently hotter and not as well-ventilated as I’d like, the winter squash will at least be dry, warm, and elevated off the ground.  Elevation is important for air circulation and for keeping the squash a little bit out of the way of bugs and rodents that would like to eat them.


Butternut and delicata squash curing on wire racks in the greenhouse


Pie pumpkins curing up off the ground on pallets in our hoophouse.


I could have allowed my winter squash to continue sitting in the field on their vines and let them cure out in the open air.  With lots of hot, wet days in the forecast, however, I didn’t want to run the risk of having my squash rot, especially because most of their vines have died back and therefore aren’t providing the life support the squash need to fight off the agents of rot.  Also, as the squash sit in the field, their starches convert to sugars and they become more delectable to the palates of deer and other vermin.  So, I decided that it was finally time to get the winter squash up and out of the field.  Now we can cut down the forest of weeds that have grown up around the winter squash, and hopefully sow some quick growing cover crop to help return some fertility to the soil and create a dense stand of cover crop instead of a dense stand of weeds.


After we picked winter squash today, my dad mowed in the dead squash vines and weeds.


The squash will only need a couple of weeks to cure before I can put them in storage, which will likely be on a covered porch where they will be out of the sun and rain.  There they will remain until the temperature drops below about 50 degrees.  Once that happens, I will need to bring them indoors so they can remain cool, but not too cold.  Ventilation is also important in the storage phase.  Hopefully, I will have a lot of my winter squash sold by the time 50 degree weather comes around.  Whatever is remaining will go on shelves in my house until I sell it or eat it all.  And I plan on eating A LOT of squash this winter – aside from being delicious, winter squash are packed full of nutrients and may help fight seasonal affective disorder during cold and short winter days.


​Fight off the winter blues by eating more pumpkin pie!


Once I have time and money to add more infrastructure to my farm, it would be fantastic to have dedicated curing and storage areas for my winter squash and other storage vegetables, especially because storage vegetables allow a farmer to continue to make sales well after the growing season has ended.  Last year, when I worked at Local Roots Farm outside of Seattle, the farmers, Siri and Jason, purchased an insulated shipping container for storing winter squash.  The container had vents on one end that could be opened or closed to help regulate the temperature and it had a dehumidifier and a fan to keep the air moving and at the right humidity.  We still had some squash rot in storage, but for the most part, it allowed us to keep literally tons of squash safely stored through the fall and winter.  You can read more about the shipping container here on the Local Roots Farm blog.

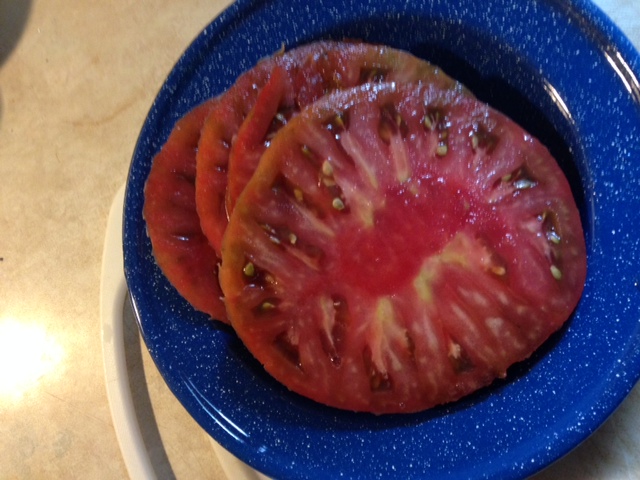
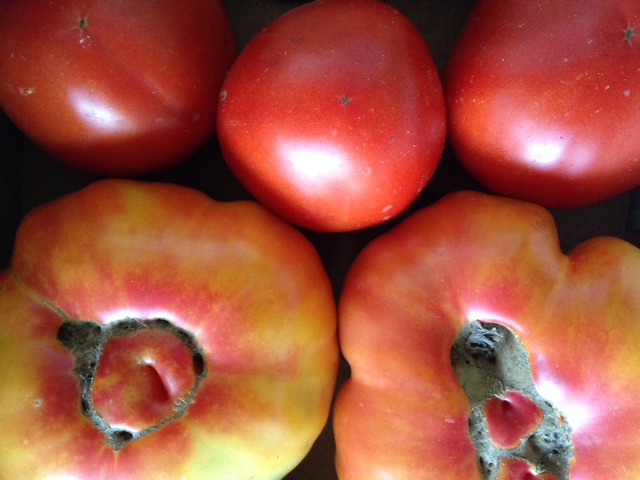
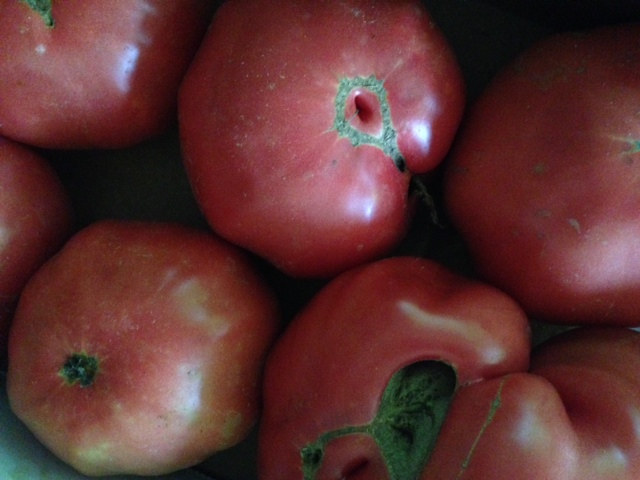
Picking, carrying, sorting, wiping, and moving winter squash can be a tedious task, but luckily Chris and I had many extra hands on deck today.  Many thanks go to our parents, Jana, David, Sue, and Roger.  With their help, we managed to not only pick the majority of the winter squash patch, but also pick all the tomatoes for market tomorrow, and we finished up before lunch and the onset of rain for the next couple of days.  I’m quite glad the winter squash are spending the night dry and under cover instead of out in a warm, wet field.


Food Dollars

While wasting time on Facebook earlier this week, I saw this photo that a farmer friend had shared:

Kentucky Proud

This sign was up at the Kentucky Proud Experience at the Kentucky State Fair.  Kentucky Proud is a branding program run by the Kentucky Department of Agriculture.  Not only can farms in Kentucky be “Kentucky Proud,” but also value-added producers, restaurants, farmers markets, and grocery stores that support Kentucky grown or Kentucky made products.  In case you are wondering, yes, Dark Wood Farm is a Kentucky Proud producer.

I have no idea how accurate the sign is, but it got me intrigued to crunch the numbers.  [PLEASE LET ME KNOW IF MY MATH DOESN’T ADD UP!!] Assuming that $500 million could be generated if Kentuckians spent 10% of their food dollars on Kentucky Proud products, that means that Kentuckians spend $5 billion each year on food.  With roughly 4.4 million people living in the state of Kentucky, that means that every man, woman, and child in Kentucky spends roughly $1,140 on food each year.  If each person were to allocate 10% of their food dollars to Kentucky producers, that would come out to $114 per person per year, or $9.50 per person per month.  I don’t know about you, but that seems like a totally do-able amount of money to spend each month supporting local farmers, producers, restaurants, and farmers markets.  In fact, it seems silly that folks can’t spend more than $10 per month on local food.  It certainly will make me look at old Alexander Hamilton a little differently next time he peers up at me from my wallet.

What kind of food could you buy with $10?
When you buy locally, not only do you support your farmer neighbors and friends, but you reduce the number of miles your food travels from the farm to your plate.  That means you eat fresher, tastier food, and less fuel is burned transporting your food in the process.  I’m probably preaching to the choir here because, if you are reading this, you are obviously interested in my farm and I only sell my vegetables and fruit locally.  Nonetheless, I think it’s important that we always keep in mind where our food dollars are going and the people that they are supporting.  I know it is difficult to buy every food item in a modern diet locally.  Heck, I spend money on cooking oils, salt, pepper, spices, tea, coffee, chocolate and other things that don’t grow around here.  However, when I buy these things, I try to turn to my local markets.  I can get most of my spices, tea, and coffee from locally-owned small businesses, and I can talk to the owners of those businesses and ask where they source those items.  I can also look at labels in the grocery store to find out if the products are organic, if they are fair trade, where the business is located, and in some cases I can find out if the product contains any GMO ingredients.

I’m not trying to get super preachy here and say that everyone should make the same food choices as me, but I would challenge you to actively make your own food choices.  What is important to you and your family when it comes to food?  What kinds of food do you want to eat? Who produces the kind of food you want to eat? Where does that food come from?  Your food dollars make a difference for the producers of that food, and it that way, your food dollars can directly support farmers and businesses in your community.  But food dollars aren’t all that matters.  I once heard someone say that every dollar you spend on food is like a vote, and while I understand the logic behind that idea, it makes me feel a little squirmy.  It implies that the people with the most money have the most votes, and people with less money have fewer votes.  There are so many things that you can do to support local food that don’t involve “voting” with your dollars.  Sure, where you spend your food dollars makes a big difference, but you can also do things like grow some of your own food, whether it’s an expansive garden or just a few containers with basil on your balcony.  You can cook more meals at home using local, seasonal ingredients.  You can get to know your local food producers, ask them questions about their growing practices, and support them by spreading the word about their businesses.  You can volunteer to help out on a farm or a community garden in exchange for food.  You can donate fresh, locally grown food to a food pantry.  You can support policies in your local government that protect agricultural lands and keep them available to farmers at affordable prices.  You can simply just read a book or two about food.  All of these activities will make a difference in how you eat, how you think about your food, how you choose to support food producers, and thus have a ripple effect through your food system.

Here are a couple of places where you can get to know your local food producers:

Melon Mistakes

Melon season arrived on the farm last week, and it seems like it will only last another week or so.  It’s a flash in the pan, but a sweet and juicy flash in the pan.  I have never grown melons before this year.  In the Pacific Northwest, where I learned most of my farming skills, it was difficult to grow melons because they like prolonged hot weather.  I’ve learned a lot of lessons about growing melons (both cantaloupe and watermelons) this year, mostly from screwing up, so I thought I would share my screw-ups with you all so you too can learn from my mistakes.

Dark Wood Farm melons

​Our first melon harvest for market was August 9. Jackpot!
Lesson 1: Not all “cantaloupes” are technically cantaloupes

I thought any melon with orange flesh and tan, rough skin was a cantaloupe.  That’s not true!  Cantaloupes are a specific type of muskmelon.  Other muskmelons include honeydew and Armenian cucumbers.  The name refers to the fragrant odor that these melons release when ripe.  Technically, the term cantaloupe refers to a specific type of muskmelon from Europe with orange flesh, but no ribs or netting.  However, we have more recently accepted the term cantaloupe for all of the sweet, orange fleshed muskmelons with netting and ribs that are so popular in North America.  Who knew?  Not me, until I read the descriptions of muskmelons and cantaloupes in seed catalogs this winter.

Cantaloupe
​A honey rock muskmelon. We’d call this one a cantaloupe because we’re ‘mericans.
Lesson 2: Bet on poor germination

I thought I’d get a leg up on getting my melon patch established, so I decided to start my melons as transplants in the greenhouse.  I had heard that they don’t transplant well, but with the late frosts and freezes we were experiencing this spring, I thought it would be better to start them out in the greenhouse where it would be warm enough, then transplant them out in late May when the soil would surely be warm enough for these heat loving plants.  I had flats with 32 cells, which are basically little plastic square shaped pots.  On April 25, I filled them up with soil and placed a single cantaloupe or watermelon seed in each, watered them in and waited for them to grow.  I always allow for 20% germination failure, knowing that some seeds are duds, so I planted 20% more seeds than I needed.  When melons sprout, they have enormous cotyledons, which are the first two baby leaves that poke out of the ground, unfold, and start photosynthesizing to make the plant grow it’s first true leaf.  Well, once my melons germinated, I noticed that I had barely a 50% germination rate.  That meant that I wouldn’t have enough melon plants to fill out the beds where I intended to plant them.  Ack!  Next year, I’ll know to plant at least twice as many melon seeds, if not more.
Lesson 3: Don’t assume your melon patch will be weed free

Melons, like their cousins, squash and cucumbers, have very long vines with large leaves.  These plants do a great job of spreading and making a canopy of huge leaves, under which weed seeds have a difficult time germinating.  Assuming that my baby melon plants would take off and out compete the weeds, I put “weeding the melons” very low on my priority list.  The result?  My melon patch is the weediest spot on the farm.  Name the weed, and I’ve got it in my melon patch.  Every time I harvest cantaloupes and watermelons, I feel like I’m on a treasure hunt.  As fun as that is, it probably takes me 5 times longer to harvest melons than it would if I could actually see them sitting on the ground.

Moon and Stars Watermelon
When I found this Moon & Stars watermelon amongst the weeds, I squealed with delight.
Lesson 4: Deer love melons

My favorite variety of watermelon is a small little yellow-fleshed watermelon called Petite Yellow.  They are so sweet, and just the right size for two people to eat in one sitting.  Another bonus – they are almost all flesh with very thin rinds.  However, their sweet aroma and thin rinds makes them prime candidates for a late night deer snack.  Just before all my Petite Yellow watermelons ripened, deer wiped them all out…ate the whole things and left only a tiny bit of rind on the ground.  I managed to salvage one Yellow Petite that was well hidden under my weed canopy, and a couple more have grown since the major deer attack in mid-July, thankfully.  I’m saving these little jewels to eat myself!

Petite Yellow Watermelon
A Petite Yellow watermelon that escaped the deer attack.
Lesson 5: Don’t get antsy and pick melons too soon

In mid-July after the deer attack on my Petite Yellow melons, I was gripped with fear that the deer would eat all of my melons, so I decided to start harvesting them.  After all, if the deer were sniffing them out, they must be ripe, right?!  Wrong.  I picked two Sugar Baby watermelons and cut them open.  One was completely white inside and the other was barely pink.  Interestingly, they were still sweet.  Not as sweet as a fully ripe melon, but still very edible.  I decided to wait a couple more weeks, keep my fingers crossed that the deer would leave them alone.  Luckily, the deer ignored them and I started finding ripe watermelons about two weeks ago.  Of course, I had to taste test them before I brought them to market, so I didn’t begin selling any until last week.  I have learned a few tips for identifying ripe melons.  Watermelons have a little curly tendril that grows across the vine from their stems.  When this tendril dries up and turns brown, your melon is likely ready, but you still want to look for a yellowish spot where the melon sat on the ground, and listen for a hollow sound when the melon is thumped.  When all three of these signs have coincided, I have found nicely ripe melons.  For cantaloupe, you can sniff the melons, and a strong sweet scent indicates they are ripe, plus they will slip right off the vine with barely any pressure.  I have noticed that size doesn’t indicate ripeness; I have found large under-ripe melons, and tiny fully-ripe melons.  It seems that size may have more to do with how much water the plant received than ripeness.  I didn’t irrigate my melons at all, and they are smaller than average, but REALLY sweet, and still juicy.  I think the lack of irrigation helped to concentrate the sugars rather than making a huge, watery melon.

Quetzali Watermelon
​Yay! I learned to pick fully ripe watermelons! This one is a Quetzali.
Lesson 6: Ripe cantaloupes don’t last long

Because I wait to pick my cantaloupes until they are super sweet, fragrant, and slip right off the vine, they have a very short shelf life.  They seem to develop soft spots overnight.  Although this makes them difficult to sell, I have found that they are still very good, and only need a little of the soft spots cut off.  Even so, I haven’t been selling any of my cantaloupes that have bad soft spots.  Instead, I have been eating them and giving them away to family and friends.  In fact, I just cut up two of them and am trying out a recipe for melon sorbet.  It calls for vodka.  I’m not sure if that helps the sorbet reach the correct consistently, or it’s just to add a little livelihood to my dessert, but I didn’t question it, and I now have vodka-y, lemony, melon puree in my refrigerator cooling before I put it in my ice cream maker.  You can try it out with watermelon too, or a mix of cantaloupe and watermelon.  Cheers!

After the Market

The past few weeks at the farmers market have been the busiest of the year.  There are a few factors contributing to this, as far as I can tell.  With cooler-than-normal temperatures this summer, folks have been out enjoying the weather and spending a little extra time at the market, especially now that it’s corn, tomato, and watermelon season.  There are so many beloved summer vegetables ripe and ready right now that it is truly the best time of year to visit the market.  Chris and I have spent some long days harvesting in preparation for the busy July and August markets, and every time we pack up the truck to head to the market, I am amazed that we are able to fit everything.  We like to keep our booth stocked for the duration of the market, rather than run out of things early, which means we often come home with leftover vegetables.  When I worked at Local Roots Farm in Seattle, leftover vegetables weren’t a problem.  We had an honor system farm stand on the road where we could sell nice leftover vegetables, and anything that was wilted could go to our laying hens or pigs.  Here at Dark Wood Farm, I don’t have a farm stand, and we don’t have any farm animals except for Smudge the cat, and she’s not too keen on leftover chard.  So you might be wondering what we do with our leftover veggies, and the answer is – we do lots of things!  Chris and I both love to cook, so in the days following a farmers market, we prioritize cooking with the items left over from market.  For example, today I used up one bunch of sorrel, a bunch of chard, three onions, some leeks, a tomato, and several peppers, and that was only for one meal – lunch!


Tomato Salad
​Part of our lunch today: heirloom tomato, bell peppers, and seared padrone peppers with sea salt.


Whatever we don’t eat either gets stored, sold, donated, composted, or preserved.  Here’s a little bit about each of these avenues:

Some leftover items, like potatoes, will store perfectly fine until our next market in a few days, so we hang on to those.  The tricky part about holding vegetables until the next market is finding a good place to store them.  Each vegetable has a preferred temperature and humidity, so you often can’t store everything in one place.  Some veggies need to be refrigerated, some don’t.  Most of them need to be kept out of the sun and out of the reaches of rodents or other animals looking for a feast.

Some of the higher demand items get sold to friends, family, and neighbors, especially the ones that live along the road between the market and the farm.  From time to time, the Rabbit Hash General Store, just 3 miles down the road, will sell some of my nice leftover goods.  We also donate lots of greens and other perishable items to a food pantry run by CAIN – Churches Active in Northside.  They pick up the veggies right at the end of our Wednesday market in Northside, then stock their pantry for guests on Thursday morning.

Surprisingly, when all is said and done, we have very little vegetable matter leftover to compost.  I started two compost bins when I moved onto the farm in January.  They are simply cylinders of wire mesh with a few support poles.  They are each three feet tall and a foot and a half wide.  I dump vegetable scraps inside the cylinder and then top it with a handful or two of carbonaceous or “brown” material like dry leaves.  Lately, I have been using some of the chaff I winnowed off of my mustard crop mixed with some cocoa bean husks that I picked up from the new chocolate shop at Findlay Market, Maverick Chocolate.  These dry materials help balance out the wet, nitrogenous food and veggie scraps and keep the compost smelling pleasant.  I’m 8 months in, and the first cylinder is only about 60% full!  As all the microbes and insects quickly work their way through the compost during the heat of the summer, the volume compresses, even though Chris and I are adding a couple bowls of fresh material every day.

Compost bin
One of our compost bins, holding 8 months worth of compost!

For me, the most exciting aspect of market leftovers at the moment is the opportunity it provides to squirrel food away for the winter.  This past winter, when I first moved onto the farm, my pantry was bare except for a few winter squash, shallots, garlic, and root vegetables that I stowed away in little nooks and crannies of my car when I left Local Roots and moved home to Kentucky.  Luckily, I quickly befriended some local farmers including Barry at Red Sunflower Farm, and he was kind enough to share some frozen beans, squash, and canned tomatoes to help me get through the winter until the first asparagus and rhubarb peeked through this spring.  Now that my farm is in full abundance, I intend on stocking my pantry for the winter so that I can eat some healthy farm foods even when the ground is frozen.  A couple weeks ago, I wrote about drying herbs and saving mustard seed, and I mentioned how I had been putting off canning because of how hot it makes the kitchen.  Now that tomato season is here, I’ve had to suck it up and deal with the heat in the kitchen.  At the end of each market, I normally have some dented and bruised tomatoes that didn’t survive the truck ride to the market, so they have been going into the canning pot then onto my shelf for making chili and tomato-y beans and greens this winter.

cooking a pot of tomatoes
​A pot of roma and heirloom tomatoes cooking down before being packed into jars for canning.
​Pulling finished jars of tomato out of my great grandma's pressure cooker from 1961.
​Pulling finished jars of tomato out of my great grandma’s pressure cooker from 1961.
Summer in jars - my mom's canned green beans and my canned crushed tomatoes.
Summer in jars – my mom’s canned green beans and my canned crushed tomatoes.

I am growing a small Italian heirloom tomato called Principe Borghese, which no one seems to want to buy.  I decided to try growing it when I read in the seed catalog, “used for sun-dried tomatoes as it has few seeds and little juice.” Sun-dried tomatoes! YES! I love sun-dried tomatoes, so I was sure that several of my market customers would be excited about a tomato that is exceptional for drying.  Well, my instincts perhaps were wrong, because I normally bring home 75% of the Principe Borghese tomatoes that I pick.  I’m not worried about it, though, because it takes me about 10 minutes to cut up the leftover Principe tomatoes and put them in the dehydrator, then in 48 hours I have a jar full of aromatic sun-dried tomatoes.

​Sun-dried Principe Borghese tomatoes bound for some winter pasta and pizza.

My latest experiment in food preservation is homemade hot sauce.  I am bringing two types of hot peppers to the market currently: green jalapenos and fish peppers.  They have been selling so-so, and after Wednesday’s market, I had a pint of each that no one bought so I decided to try making green hot sauce.  Following this recipe online, I chopped the peppers in my food processor with some salt, then transferred the hot pepper puree to a jar to ferment overnight.  The next day, I added vinegar, and I am currently letting it sit for a week to develop flavors before I will sieve out the pepper chunks and put the liquid hot sauce into a bottle.

 ​Jalapeno and fish hot peppers; hot sauce in the making!

​Jalapeno and fish hot peppers; hot sauce in the making!


Hot peppers pureed with salt, fermenting into hot sauce.

​Instead of looking at my leftover market vegetables as a burden, I choose to look at them as a challenge.  How can I find more outlets for my vegetables, how can I improve my composting system, which new recipes can I explore, and how can I preserve these vegetables so I have food from my own farm when fresh vegetables are out of season?  I am learning so much from these challenges, and setting myself up to have a winter with fewer trips to the grocery store, so I am thankful for the overabundance.


Tasty Tomatoes

My friend, Morgan, had Chris and me over for dinner last night, and she put in a special request that we bring over some heirloom tomatoes.  I was happy to oblige; we have plenty of them at the moment, and we are excited to share them with our friends and family.  I brought over several varieties and we taste tested at least three, all of which where juicy, dense, and sweet.  Morg asked, “Why do heirlooms taste so much better?” and I thought y’all might have the same question, so here’s my answer in several parts:


Let’s start by discussing just what the heck makes a tomato (or any other vegetable, for that matter), an “heirloom.”  Do any of you have an old piece of jewelry or antique passed down through your family?  When I turned 15, my aunt, Jennifer, gave me a little gold ring that she had received on her 15th birthday from my great grandmother, Mutzi.  In turn, Mutzi had received the ring on her 15th birthday from her father.  That’s an heirloom.  Something that has been passed down over the years through the generations of a family.  Now, let’s shift the gears and talk about heirloom vegetables.  In the days before seed catalogs, folks would save seeds from the myriad vegetables they were growing for fresh eating and preserving, and plant those saved seeds in subsequent year.  In fact, a family could save the seed from their best, most flavorful, most vigorous and healthy plants, and by doing that every year, improve their vegetables’ taste, texture, and production at that specific location.  Let’s fast forward to what agriculture looks like today.  We now live in a world where vegetable production has converted from diverse backyard gardens to large-scale monocultures, meaning vast acreages of one crop, often picked by a machine instead of by a human hand.  We also live in a world where we seldom walk out the back door, pick our vegetables, and eat them immediately.  Instead, we go to the grocery store and buy vegetables that were picked at an unknown date, packed, and shipped some unknown number of miles away.  For a vegetable to be “successful” in today’s agricultural world, it must maximize production per acre, be easy to pick by a machine, be easily washed and packed, resist bruising during shipping, sit stably on a shelf for an untold amount of time, be uniform in color, shape, and size so it displays nicely, and last for weeks in your refrigerator’s vegetable drawer.  So, instead of seed that has been saved by families for flavor, ripeness, and vigor in a specific location, we now eat vegetables from seeds that were saved for uniformity, hardness (for shipping purposes), and shelf stability.  Note that I did not include “flavor” in that list.  To achieve these modern goals, people have done crazy things to seeds, including inserting genetic material from other life forms into the DNA of vegetables, making them genetically modified organisms, or GMOs.


Chrokee Purple Tomato
A meaty, juicy Cherokee Purple tomato, a Tennessee heirloom, likely of Cherokee Indian origin. One slice will fill your bowl!


Most vegetables develop flavor as they approach ripeness.  This is especially the case with tomatoes.  Ever eat one of those hard, white-in-the-center, tomatoes from the grocery store in January?  They have absolutely no flavor because they were picked under-ripe to keep them hard for shipping.  A tomato that is allowed to ripen on the vine has time to develop sugars, which cause the tomato to be soft to the touch, juicy when cut, fragrant, and sweet.  The sugars also cause the tomato to rapidly decay and soften if you don’t eat them shortly after they are picked.  A soft, sugary tomato does NOT travel well, and it certainly doesn’t travel well over thousands of miles.  Really, the only way to get your hands on one of these babies is to grow them and pick them yourself or to buy them from someone growing them nearby.  This is where your friendly, small-scale farmer comes into play.  Small-scale farmers can pick tomatoes by hand, noting which are at their peak of ripeness, handle them gently, and deliver them to a market or to your doorstep in a short amount of time.  Small-scale farmers can peddle even the ugliest of tomatoes, including cracked and crazy-looking tomatoes (as heirlooms often are), because they can talk with their customer one-on-one, describe the flavor, describe their growing practices, let you smell, touch, and even taste test the vegetables.  Farmers that grow for wholesale simply can’t do this.


Williams Striped tomato
Huge, gnarly-looking pink-and-yellow Williams Striped tomatoes, an heirloom variety from Kentucky​


While I do have my great grandma’s heirloom ring, I don’t have any heirloom seeds that were passed down in my family.  Luckily, there are a lot of small-scale growers out there, dutifully saving seeds from old heirloom varieties and sharing them with other farmers.  This year, I ordered most of my seeds from Fedco, a seed co-op based in Maine, and Southern Exposure Seed Exchange, which is a network of growers that specialize in varieties that grow well in the Mid-Atlantic and Southeastern US.  Through the hard work of these growers, many heirloom varieties live on and are available for growers like me – new farmers just getting started and in need of delicious locally-adapted varieties to grow for their friends, family, and neighbors.


Granny Cantrell's German Pink tomatoes
Granny Cantrell’s German Pink, an heirloom variety grown by Lettie Cantrell of West Liberty, KY