It’s fall, folks. Leaves are falling, there’s a chill in the air, and we’re caught each day in the balance between golden rays of sun and cloudy, drizzly skies. We have had several stunning sunsets at the farm lately, featuring half stormy, half sunny skies. Each day, that sunset comes a little bit later and I’m reminded that winter will be here before too long and all my precious fresh vegetables will be dead or hibernating under a blanket of snow.
A stormy sunset on the farm at the beginning of October.
With the time we have left, I have been gathering together food and squirreling it away for winter. My most squirrel-like project, literally, has been gathering walnuts that have fallen from the black walnut trees on the farm. Each walnut is covered in a very tenacious husk that you must peel away before you get to the equally impenetrable nutshell concealed within. A little over a week ago, I picked up a bushel of fallen walnuts and brought them into the house where I sat atop a layer of towels and pulled the husks off with gloved hands. Walnut husks will dye your hands black, and even with my gloves on, I managed to blacken my thumbs and forefingers, and they are STILL black over a week later.
A bushel of walnuts I scavenged from the edges of the garden.
It is impossible to remove every little bit of fleshy husk from the walnut shells, so after I had husked them, my dad brought his pressure washer down to the farm and we blasted them with high pressure water. Now they are sitting on my porch (protected from squirrels) drying and curing for a couple of weeks before I crack the shells to extract the nut meat from inside. Apparently, black walnuts have the hardest shells of any walnut species and will destroy a regular nutcracker, so you have to crack them with a hammer on a hard surface. I look forward to the challenge!
Cleaned and dried walnut shells. Let’s get cracking!
Back in mid-July, I gathered a couple dozen green walnuts from the trees for another project. At that time of the year, the walnuts were still green and hadn’t yet formed a hard shell inside. You can cut right through them with a regular kitchen knife and a little bit of forearm oomph. I cut the green walnuts in quarters, stuffed them in mason jars, and poured vodka over them. My aim was to make Nocino, a bitter liqueur favored in Italy, which can be used for medicinal purposes. And drinky treats too, of course. The green walnuts must steep in high grain alcohol or vodka for at least a few months before it is consumed. Back in July, I figured I’d give the nocino a good 6 months before I break it open. That way, when it’s freezing cold in December or January, I’ll have my own homemade walnut tonic to keep me warm. It’s just another bit of farm-y summer goodness put away in jars for the winter.
Chopping green walnuts back in July for some mid-winter Nocino.
This is what the walnuts looked like right after the vodka was added to the jars…
The past few weeks at the farmers market have been the busiest of the year. There are a few factors contributing to this, as far as I can tell. With cooler-than-normal temperatures this summer, folks have been out enjoying the weather and spending a little extra time at the market, especially now that it’s corn, tomato, and watermelon season. There are so many beloved summer vegetables ripe and ready right now that it is truly the best time of year to visit the market. Chris and I have spent some long days harvesting in preparation for the busy July and August markets, and every time we pack up the truck to head to the market, I am amazed that we are able to fit everything. We like to keep our booth stocked for the duration of the market, rather than run out of things early, which means we often come home with leftover vegetables. When I worked at Local Roots Farm in Seattle, leftover vegetables weren’t a problem. We had an honor system farm stand on the road where we could sell nice leftover vegetables, and anything that was wilted could go to our laying hens or pigs. Here at Dark Wood Farm, I don’t have a farm stand, and we don’t have any farm animals except for Smudge the cat, and she’s not too keen on leftover chard. So you might be wondering what we do with our leftover veggies, and the answer is – we do lots of things! Chris and I both love to cook, so in the days following a farmers market, we prioritize cooking with the items left over from market. For example, today I used up one bunch of sorrel, a bunch of chard, three onions, some leeks, a tomato, and several peppers, and that was only for one meal – lunch!
Part of our lunch today: heirloom tomato, bell peppers, and seared padrone peppers with sea salt.
Whatever we don’t eat either gets stored, sold, donated, composted, or preserved. Here’s a little bit about each of these avenues:
Some leftover items, like potatoes, will store perfectly fine until our next market in a few days, so we hang on to those. The tricky part about holding vegetables until the next market is finding a good place to store them. Each vegetable has a preferred temperature and humidity, so you often can’t store everything in one place. Some veggies need to be refrigerated, some don’t. Most of them need to be kept out of the sun and out of the reaches of rodents or other animals looking for a feast.
Some of the higher demand items get sold to friends, family, and neighbors, especially the ones that live along the road between the market and the farm. From time to time, the Rabbit Hash General Store, just 3 miles down the road, will sell some of my nice leftover goods. We also donate lots of greens and other perishable items to a food pantry run by CAIN – Churches Active in Northside. They pick up the veggies right at the end of our Wednesday market in Northside, then stock their pantry for guests on Thursday morning.
Surprisingly, when all is said and done, we have very little vegetable matter leftover to compost. I started two compost bins when I moved onto the farm in January. They are simply cylinders of wire mesh with a few support poles. They are each three feet tall and a foot and a half wide. I dump vegetable scraps inside the cylinder and then top it with a handful or two of carbonaceous or “brown” material like dry leaves. Lately, I have been using some of the chaff I winnowed off of my mustard crop mixed with some cocoa bean husks that I picked up from the new chocolate shop at Findlay Market, Maverick Chocolate. These dry materials help balance out the wet, nitrogenous food and veggie scraps and keep the compost smelling pleasant. I’m 8 months in, and the first cylinder is only about 60% full! As all the microbes and insects quickly work their way through the compost during the heat of the summer, the volume compresses, even though Chris and I are adding a couple bowls of fresh material every day.
One of our compost bins, holding 8 months worth of compost!
For me, the most exciting aspect of market leftovers at the moment is the opportunity it provides to squirrel food away for the winter. This past winter, when I first moved onto the farm, my pantry was bare except for a few winter squash, shallots, garlic, and root vegetables that I stowed away in little nooks and crannies of my car when I left Local Roots and moved home to Kentucky. Luckily, I quickly befriended some local farmers including Barry at Red Sunflower Farm, and he was kind enough to share some frozen beans, squash, and canned tomatoes to help me get through the winter until the first asparagus and rhubarb peeked through this spring. Now that my farm is in full abundance, I intend on stocking my pantry for the winter so that I can eat some healthy farm foods even when the ground is frozen. A couple weeks ago, I wrote about drying herbs and saving mustard seed, and I mentioned how I had been putting off canning because of how hot it makes the kitchen. Now that tomato season is here, I’ve had to suck it up and deal with the heat in the kitchen. At the end of each market, I normally have some dented and bruised tomatoes that didn’t survive the truck ride to the market, so they have been going into the canning pot then onto my shelf for making chili and tomato-y beans and greens this winter.
A pot of roma and heirloom tomatoes cooking down before being packed into jars for canning.Pulling finished jars of tomato out of my great grandma’s pressure cooker from 1961.Summer in jars – my mom’s canned green beans and my canned crushed tomatoes.
I am growing a small Italian heirloom tomato called Principe Borghese, which no one seems to want to buy. I decided to try growing it when I read in the seed catalog, “used for sun-dried tomatoes as it has few seeds and little juice.” Sun-dried tomatoes! YES! I love sun-dried tomatoes, so I was sure that several of my market customers would be excited about a tomato that is exceptional for drying. Well, my instincts perhaps were wrong, because I normally bring home 75% of the Principe Borghese tomatoes that I pick. I’m not worried about it, though, because it takes me about 10 minutes to cut up the leftover Principe tomatoes and put them in the dehydrator, then in 48 hours I have a jar full of aromatic sun-dried tomatoes.
Sun-dried Principe Borghese tomatoes bound for some winter pasta and pizza.
My latest experiment in food preservation is homemade hot sauce. I am bringing two types of hot peppers to the market currently: green jalapenos and fish peppers. They have been selling so-so, and after Wednesday’s market, I had a pint of each that no one bought so I decided to try making green hot sauce. Following this recipe online, I chopped the peppers in my food processor with some salt, then transferred the hot pepper puree to a jar to ferment overnight. The next day, I added vinegar, and I am currently letting it sit for a week to develop flavors before I will sieve out the pepper chunks and put the liquid hot sauce into a bottle.
Jalapeno and fish hot peppers; hot sauce in the making!
Hot peppers pureed with salt, fermenting into hot sauce.
Instead of looking at my leftover market vegetables as a burden, I choose to look at them as a challenge. How can I find more outlets for my vegetables, how can I improve my composting system, which new recipes can I explore, and how can I preserve these vegetables so I have food from my own farm when fresh vegetables are out of season? I am learning so much from these challenges, and setting myself up to have a winter with fewer trips to the grocery store, so I am thankful for the overabundance.
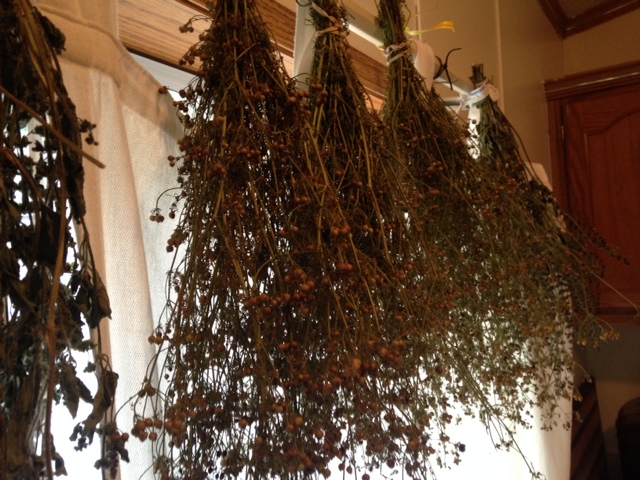
I spend a lot of time sharing news about the farm and the farming process, but I haven’t been too good about sharing homesteading stories. Part of the reason I decided to become a farmer and live on my farm is because I like growing and preserving my own food. Mainly because I love to eat and eat well. When I first moved onto the farm this winter, I decided to try tapping some of the maple trees on the property to make my own maple syrup. I ended up tapping three trees and got enough syrup to keep my pancakes topped throughout the year, with a few jars of syrup to spare to give as gifts to my family. Currently, the veggies and fruit are rolling in, and it seems like I can’t find enough spare time to do all the canning I’d like. Plus, my gas stove heats the kitchen up sooo much that I’ve convinced myself I’ll do all my pickling and canning when the fall comes and I can use the extra heat in the kitchen. For now, most of the food preservation I have been doing involves drying herbs. I can deal with the heat that the dehydrator puts off, plus I’ve been passively drying a bunch of herbs by hanging them upside down from a curtain rod in the kitchen. Any extra bunches of basil, tulsi, and coriander that I bring home from the market go right up on the “drying rod” until they are crispy dry, then I strip the leaves or seeds off the bunches and store them in a dry mason jar. It makes me excited for spices and tea this winter when my garden is under lots of snow.
Herbs drying in the kitchen
Earlier this week, I harvested a crop of mustard seeds from the garden. In April, I planted white mustard, Sinapis alba, which is used to make the table mustard we’re all used to eating. Your basic mustard comes from grinding down the seeds of this plant, and adding it to water, vinegar, or other liquids and spices. For example, dijon mustard typically includes white wine as one of the liquids. Additionally, the super yellow color we normally associate with mustard comes from the addition of turmeric, although I’m sure a lot of cheap store-bought mustard just uses food dyes these days. You can also use seeds from other mustard plants to make different kinds of mustard. In the past, I have grown brown mustard, Brassica juncea, and used it to make spicy brown mustard.
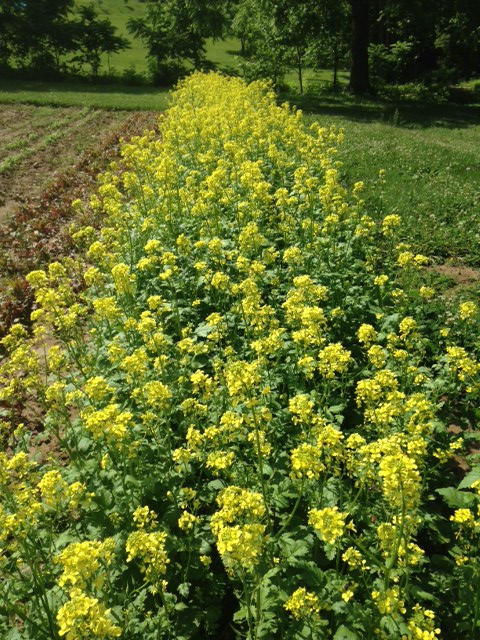
After the initial April planting of white mustard, the plants grew quite quickly and were in full flower by the end of May. And, boy, did the bugs love those flowers. It was a veritable bug orgy down there in the mustard patch.
The mustard patch in full bloom in May
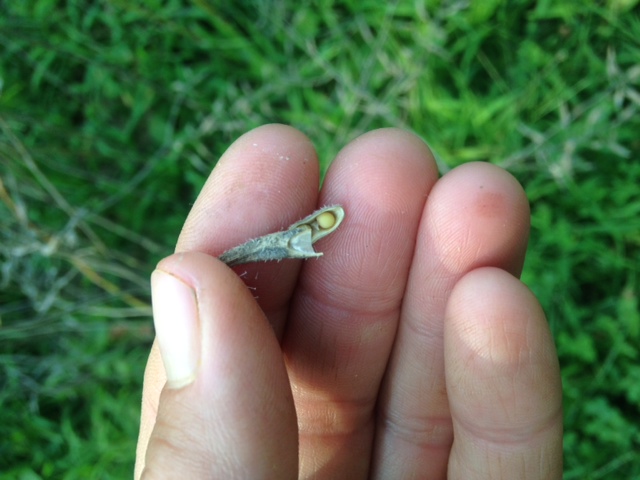
Slowly, the flowers turned into green seed pods that plumped up and filled with green seeds. Then, the seed pods began to dry up, turn brown, and the seeds inside turned from green to tan/yellow. A few days ago, while the weather was dry, I decided that the majority of the mustard plants were dry enough, and that I should harvest them before they shattered, which happens when the plant gets so dry that the pods burst open and spew their seeds all over the ground.
The mustard flowers become seed pods and dry up
Each dry seed pod contains a few mustard seeds
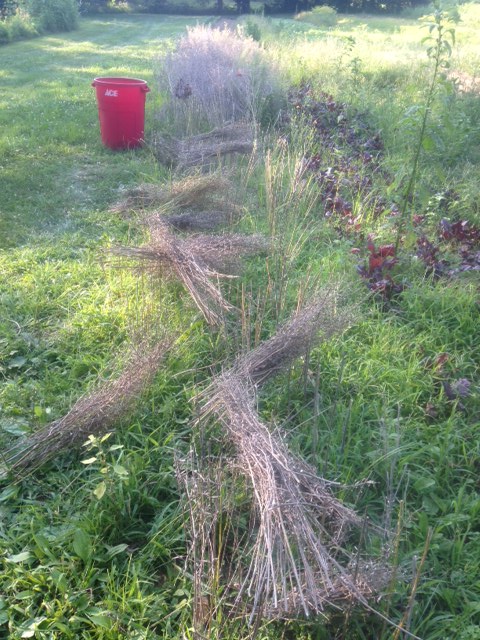
To harvest the seed, I cut down handfuls of the plants, and shook them into a large, clean garbage can, causing the seed pods to shatter and release their seeds. This process is called threshing. It took me 2 hours to thresh 250 square feet of densely growing mustard. A mechanical harvester would be a whole lot quicker, but I don’t have a mechanical harvester, and I enjoy spending time in the garden doing repetitive work. It lets me relax, listen to the birds, and let my thoughts wander. At the end of the two hours, I had a can of mustard seeds and shattered seed pods, and I left the remains of the mustard plants, or “straw”, behind to compost back into the soil.
The red garbage can I used for threshing the mustard seed and leftover “mustard straw”
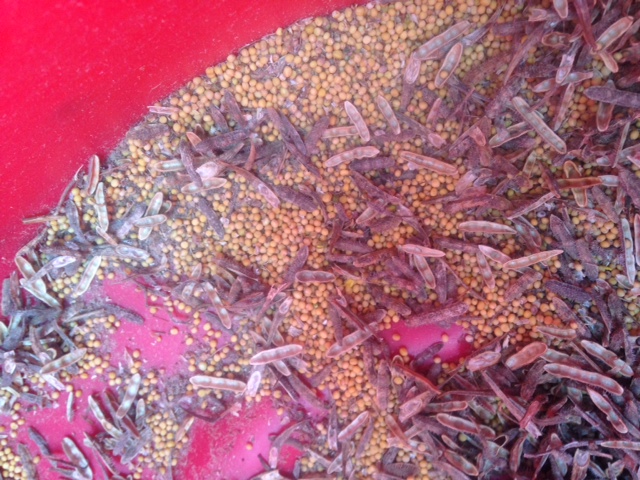
Mustard seed and shattered seed pods in the bottom of the garbage can
When I finished the threshing process, I brought my garbage can of seeds and pods to my kitchen and sifted it all through a strainer to separate out the seeds from the pods. There is still a little bit of chaff, or non-seed material, in with the seeds, so on the next low humidity day, I will take them outside with a fan and pour the seeds into a bucket in front of the fan to let the lightweight chaff blow off. All in all, I will have around 4 lbs of mustard seed, which I will use to make mustard, spice up dishes, and to make my new favorite condiment, pickled mustard seed, or “mustard caviar.” It’s a whole lot more work than buying mustard at the store, but at the end of the day, I love that my mustard will be homegrown, and the mustard patch was a huge benefit to the garden. It provided habitat for all kinds of beneficial insects during the flowering stage, its straw will help feed the soil, and because it was such a dense stand of tall plant material, it helped to keep weeds from sprouting underneath. Also, recent research has shown that growing mustard as a cover crop helps to fend off some of the pest insects and nematodes that live in the soil. All of that is wonderful, but honestly, I’m most excited about tasting my homemade mustard because, like I said, I love to eat.