Tasty Tomatoes

My friend, Morgan, had Chris and me over for dinner last night, and she put in a special request that we bring over some heirloom tomatoes.  I was happy to oblige; we have plenty of them at the moment, and we are excited to share them with our friends and family.  I brought over several varieties and we taste tested at least three, all of which where juicy, dense, and sweet.  Morg asked, “Why do heirlooms taste so much better?” and I thought y’all might have the same question, so here’s my answer in several parts:


Let’s start by discussing just what the heck makes a tomato (or any other vegetable, for that matter), an “heirloom.”  Do any of you have an old piece of jewelry or antique passed down through your family?  When I turned 15, my aunt, Jennifer, gave me a little gold ring that she had received on her 15th birthday from my great grandmother, Mutzi.  In turn, Mutzi had received the ring on her 15th birthday from her father.  That’s an heirloom.  Something that has been passed down over the years through the generations of a family.  Now, let’s shift the gears and talk about heirloom vegetables.  In the days before seed catalogs, folks would save seeds from the myriad vegetables they were growing for fresh eating and preserving, and plant those saved seeds in subsequent year.  In fact, a family could save the seed from their best, most flavorful, most vigorous and healthy plants, and by doing that every year, improve their vegetables’ taste, texture, and production at that specific location.  Let’s fast forward to what agriculture looks like today.  We now live in a world where vegetable production has converted from diverse backyard gardens to large-scale monocultures, meaning vast acreages of one crop, often picked by a machine instead of by a human hand.  We also live in a world where we seldom walk out the back door, pick our vegetables, and eat them immediately.  Instead, we go to the grocery store and buy vegetables that were picked at an unknown date, packed, and shipped some unknown number of miles away.  For a vegetable to be “successful” in today’s agricultural world, it must maximize production per acre, be easy to pick by a machine, be easily washed and packed, resist bruising during shipping, sit stably on a shelf for an untold amount of time, be uniform in color, shape, and size so it displays nicely, and last for weeks in your refrigerator’s vegetable drawer.  So, instead of seed that has been saved by families for flavor, ripeness, and vigor in a specific location, we now eat vegetables from seeds that were saved for uniformity, hardness (for shipping purposes), and shelf stability.  Note that I did not include “flavor” in that list.  To achieve these modern goals, people have done crazy things to seeds, including inserting genetic material from other life forms into the DNA of vegetables, making them genetically modified organisms, or GMOs.


Chrokee Purple Tomato
A meaty, juicy Cherokee Purple tomato, a Tennessee heirloom, likely of Cherokee Indian origin. One slice will fill your bowl!


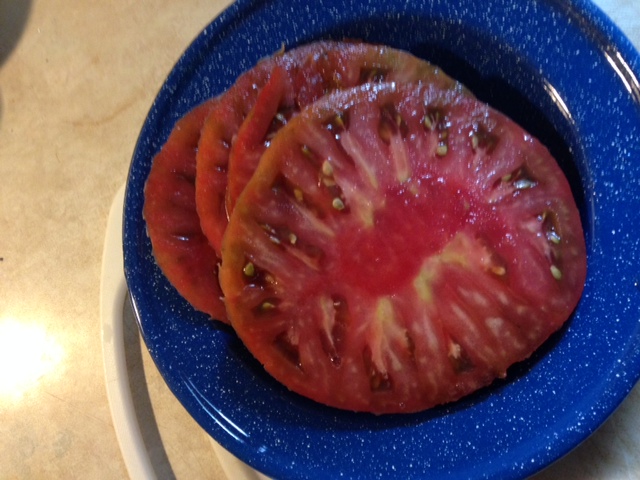
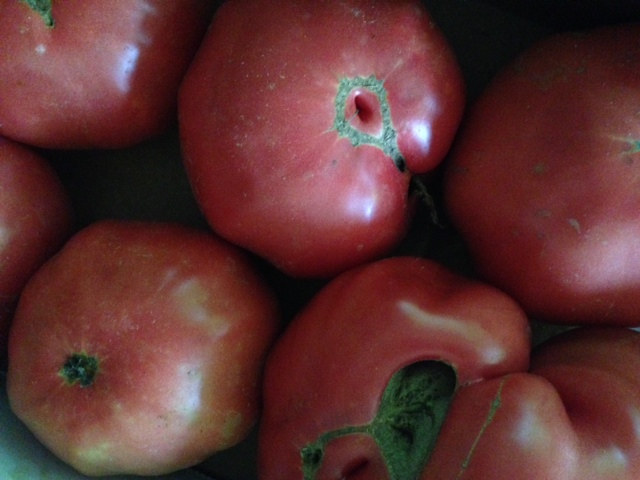
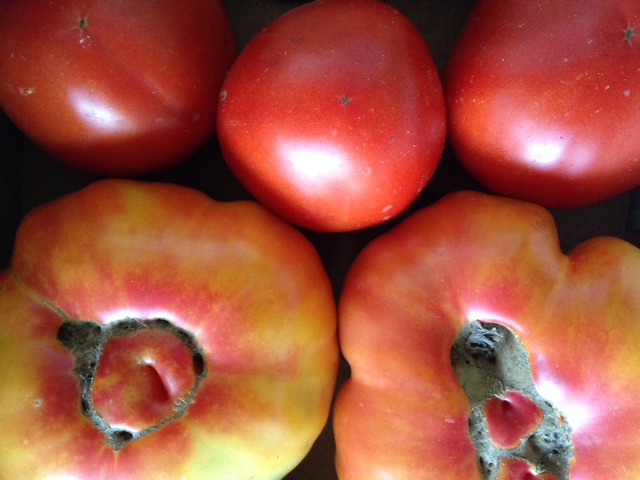
Most vegetables develop flavor as they approach ripeness.  This is especially the case with tomatoes.  Ever eat one of those hard, white-in-the-center, tomatoes from the grocery store in January?  They have absolutely no flavor because they were picked under-ripe to keep them hard for shipping.  A tomato that is allowed to ripen on the vine has time to develop sugars, which cause the tomato to be soft to the touch, juicy when cut, fragrant, and sweet.  The sugars also cause the tomato to rapidly decay and soften if you don’t eat them shortly after they are picked.  A soft, sugary tomato does NOT travel well, and it certainly doesn’t travel well over thousands of miles.  Really, the only way to get your hands on one of these babies is to grow them and pick them yourself or to buy them from someone growing them nearby.  This is where your friendly, small-scale farmer comes into play.  Small-scale farmers can pick tomatoes by hand, noting which are at their peak of ripeness, handle them gently, and deliver them to a market or to your doorstep in a short amount of time.  Small-scale farmers can peddle even the ugliest of tomatoes, including cracked and crazy-looking tomatoes (as heirlooms often are), because they can talk with their customer one-on-one, describe the flavor, describe their growing practices, let you smell, touch, and even taste test the vegetables.  Farmers that grow for wholesale simply can’t do this.


Williams Striped tomato
Huge, gnarly-looking pink-and-yellow Williams Striped tomatoes, an heirloom variety from Kentucky​


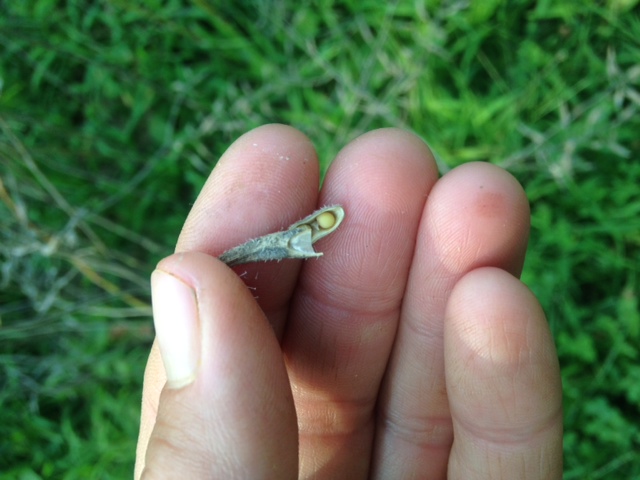
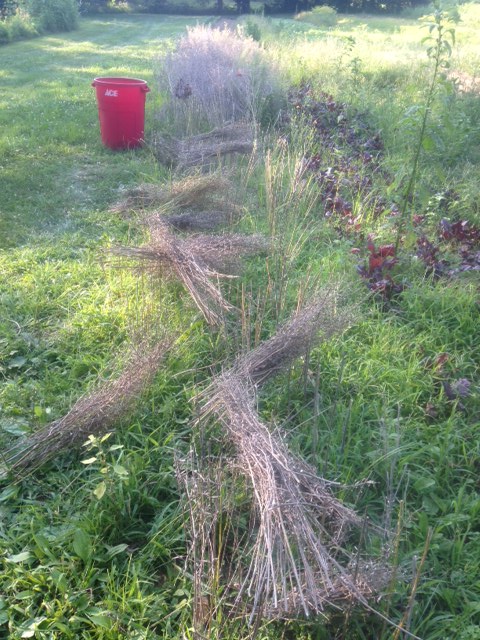
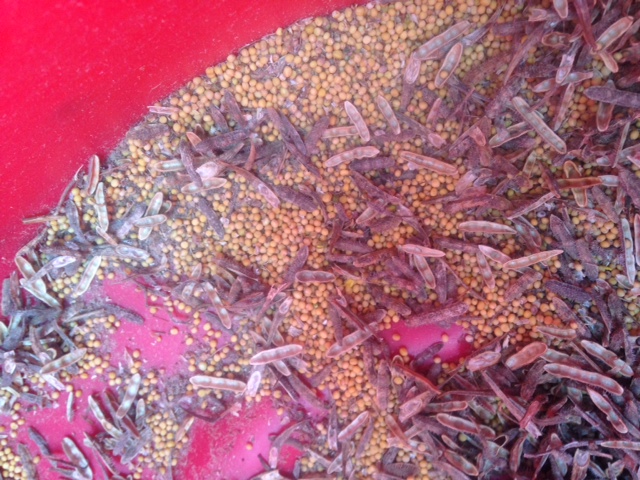
While I do have my great grandma’s heirloom ring, I don’t have any heirloom seeds that were passed down in my family.  Luckily, there are a lot of small-scale growers out there, dutifully saving seeds from old heirloom varieties and sharing them with other farmers.  This year, I ordered most of my seeds from Fedco, a seed co-op based in Maine, and Southern Exposure Seed Exchange, which is a network of growers that specialize in varieties that grow well in the Mid-Atlantic and Southeastern US.  Through the hard work of these growers, many heirloom varieties live on and are available for growers like me – new farmers just getting started and in need of delicious locally-adapted varieties to grow for their friends, family, and neighbors.


Granny Cantrell's German Pink tomatoes
Granny Cantrell’s German Pink, an heirloom variety grown by Lettie Cantrell of West Liberty, KY


Making Mustard

I spend a lot of time sharing news about the farm and the farming process, but I haven’t been too good about sharing homesteading stories.  Part of the reason I decided to become a farmer and live on my farm is because I like growing and preserving my own food.  Mainly because I love to eat and eat well.  When I first moved onto the farm this winter, I decided to try tapping some of the maple trees on the property to make my own maple syrup.  I ended up tapping three trees and got enough syrup to keep my pancakes topped throughout the year, with a few jars of syrup to spare to give as gifts to my family.  Currently, the veggies and fruit are rolling in, and it seems like I can’t find enough spare time to do all the canning I’d like.  Plus, my gas stove heats the kitchen up sooo much that I’ve convinced myself I’ll do all my pickling and canning when the fall comes and I can use the extra heat in the kitchen.  For now, most of the food preservation I have been doing involves drying herbs.  I can deal with the heat that the dehydrator puts off, plus I’ve been passively drying a bunch of herbs by hanging them upside down from a curtain rod in the kitchen.  Any extra bunches of basil, tulsi, and coriander that I bring home from the market go right up on the “drying rod” until they are crispy dry, then I strip the leaves or seeds off the bunches and store them in a dry mason jar.  It makes me excited for spices and tea this winter when my garden is under lots of snow.

Herbs drying in the kitchen

Earlier this week, I harvested a crop of mustard seeds from the garden.  In April, I planted white mustard, Sinapis alba, which is used to make the table mustard we’re all used to eating.  Your basic mustard comes from grinding down the seeds of this plant, and adding it to water, vinegar, or other liquids and spices.  For example, dijon mustard typically includes white wine as one of the liquids.  Additionally, the super yellow color we normally associate with mustard comes from the addition of turmeric, although I’m sure a lot of cheap store-bought mustard just uses food dyes these days.  You can also use seeds from other mustard plants to make different kinds of mustard.  In the past, I have grown brown mustard, Brassica juncea, and used it to make spicy brown mustard.

After the initial April planting of white mustard, the plants grew quite quickly and were in full flower by the end of May.  And, boy, did the bugs love those flowers.  It was a veritable bug orgy down there in the mustard patch.

The mustard patch in full bloom in May


Slowly, the flowers turned into green seed pods that plumped up and filled with green seeds.  Then, the seed pods began to dry up, turn brown, and the seeds inside turned from green to tan/yellow.  A few days ago, while the weather was dry, I decided that the majority of the mustard plants were dry enough, and that I should harvest them before they shattered, which happens when the plant gets so dry that the pods burst open and spew their seeds all over the ground.

The mustard flowers become seed pods and dry up


Each dry seed pod contains a few mustard seeds

To harvest the seed, I cut down handfuls of the plants, and shook them into a large, clean garbage can, causing the seed pods to shatter and release their seeds.  This process is called threshing.  It took me 2 hours to thresh 250 square feet of densely growing mustard.  A mechanical harvester would be a whole lot quicker, but I don’t have a mechanical harvester, and I enjoy spending time in the garden doing repetitive work.  It lets me relax, listen to the birds, and let my thoughts wander.  At the end of the two hours, I had a can of mustard seeds and shattered seed pods, and I left the remains of the mustard plants, or “straw”, behind to compost back into the soil.

The red garbage can I used for threshing the mustard seed and leftover "mustard straw"
The red garbage can I used for threshing the mustard seed and leftover “mustard straw”


​Mustard seed and shattered seed pods in the bottom of the garbage can


When I finished the threshing process, I brought my garbage can of seeds and pods to my kitchen and sifted it all through a strainer to separate out the seeds from the pods.  There is still a little bit of chaff, or non-seed material, in with the seeds, so on the next low humidity day, I will take them outside with a fan and pour the seeds into a bucket in front of the fan to let the lightweight chaff blow off.  All in all, I will have around 4 lbs of mustard seed, which I will use to make mustard, spice up dishes, and to make my new favorite condiment, pickled mustard seed, or “mustard caviar.”  It’s a whole lot more work than buying mustard at the store, but at the end of the day, I love that my mustard will be homegrown, and the mustard patch was a huge benefit to the garden.  It provided habitat for all kinds of beneficial insects during the flowering stage, its straw will help feed the soil, and because it was such a dense stand of tall plant material, it helped to keep weeds from sprouting underneath.  Also, recent research has shown that growing mustard as a cover crop helps to fend off some of the pest insects and nematodes that live in the soil.  All of that is wonderful, but honestly, I’m most excited about tasting my homemade mustard because, like I said, I love to eat.

Dark Wood Farm FAQ

This past week, while I was out of town for wedding festivities, I caught up with a bunch of old friends.  They had lots of questions about my farm, so I thought that this might be a great opportunity to answer those questions for a broader audience.  Let’s call it a little Dark Wood Farm FAQ.


How’s the farming going?

It’s going well!  It’s a lot of hard work, it keeps me busy, and I’m not getting a lot of sleep at the moment, but I fully expect to make up some of that sleep this winter.  I really like being my own boss and being outside everyday.  I feel really strong and healthy, and I’m learning so much about growing vegetables through trial and error.


What’s your favorite part of farming so far?

I love cooking food that I grew myself, and I love sharing my vegetables with family and friends.  Cooking is a joy for me, and using such fresh, wholesome ingredients makes a huge difference in the quality of my meals.  My family and friends are trying all kinds of new veggies out my garden and eating more fresh produce than normal, which really makes me happy.  I also love talking to people at the farmers market, sharing recipes, and explaining what to do with all the odd vegetables I grow.


What are you going to do this winter?

Hopefully I will get some much-needed rest and do some traveling, but I’ll probably have to pick up a holiday job to make a little extra money.  I will also have lots to keep me busy: planning next year’s crops, ordering seeds, cleaning and fixing equipment, and building new gadgets and infrastructure to make farm work easier!


Are you making any money?

Talking about money is awkward, especially when you’re starting a new business, but I think it’s important to talk about it so that consumers are aware of how hard farmers work and how little they get paid.  I’m sure we all wish food was free, but we live in a world where most people don’t grow their own food, so the people that do grow food need to be compensated for the hard work they do to keep everyone fed with nutritious, safe, and delicious food.  Yes, I am making money at the farmers markets, but I don’t know yet if I’ll recover all my expenses this year.  At the beginning of the year, I bought a bunch of equipment and supplies to get me started, plus I always have my monthly rent and utility bills for the farm.  It would be amazing if I could make everything back this year and have a little left over to pay myself, but most new businesses don’t make money in their first year because of all the upfront equipment costs.  I’ll be able to answer this question a little better at the end of the year.  Suffice it to say, I have a lot of vegetables to sell and I am selling them, but I don’t expect to get rich this year or any other year, for that matter.  Farming is not a lucrative business, but most farmers don’t farm because they’re hoping to strike it rich.


Do you own the farm?

No, I am leasing the farm this year.  The farm belongs to the Mays family, whom I have known for almost 15 years.  They are leasing me the land where I grow the vegetables, plus a trailer on the property where I live.  I also get to use the tractor and farm implements, and I can harvest from the existing apple trees, blackberry bushes, and strawberry and asparagus patches.  I hope to have my own farm one day, but leasing is the best option for me as a first-time farmer.  Without the burden of a mortgage, I can figure out if I will be able to farm full time without another income source, if there’s a market for the kinds of vegetables I want to grow, and if I am capable of growing said vegetables in Northern Kentucky’s soils and climate.  I learned most of my farming skills in Washington and California, both of which have very different growing conditions than here.  It is also extremely helpful to have some existing equipment on hand because it has aided in keeping my first year costs down while I figure out how to run my farming business.


How big is the farm?

The entire farm is roughly 35 acres, most of which is hilly and wooded.  The parcel where I grow everything is just under 2 acres.  Some of that 2 acres is taken up with grassy headlands, trees along the edges, my greenhouse, and a blackberry patch, so the actual area that I am tilling to grow annual vegetables is 1 acre.


Is your family glad to have you home?

That’s a question best answered by my family, but I am pretty sure they are happy to have me home.  I have been away from Kentucky for 10 years, and while it feels like a big change to come home, it also doesn’t.  My family and friends have been so wonderfully supportive that it has been pretty easy to pick up where I left off.  Sure, I miss my friends in Seattle, but I also miss my friends from New York, and friends that are now scattered all over the country.  I wish I could scoop them all up and bring them to my farm so we can all live together, but that’s not very realistic.  Luckily, with the support of my friends and family here in Kentucky, I was able to take a little vacation to the West Coast for a wedding in mid-July when the farm was in full swing.  I hope I will always be able to take trips like that, and I feel pretty blessed to have friends waiting with open arms wherever I go.


​My garden, Dark Wood Farm, in full bloom in July.

Weeds or Nature’s Support?

This past week on the farm, a major crop of weeds sprouted following two days of heavy rain.  Our onions and celery seemed to be engulfed in them overnight.  Last Monday, Chris spent half the day clearing out around the onions and on Wednesday, my parents and our friends, Tina and Donna, helped to save the celery.  These crops in particular have a hard time out-competing their weed neighbors.  They are skinny and tall and don’t send out a lot of horizontal leaves that would shade out their competitors, so they require repeated weeding to ensure they receive sufficient light and water instead of their free-ranging weed neighbors.

​My mom and our friends, Tina and Donna, weeding the celery.  Here's the before photo...
​My mom and our friends, Tina and Donna, weeding the celery. Here’s the before photo…

​ ...and after!  The celery is winning now!
​ …and after! The celery is winning now!


Whenever I think of weeds, I think of a story that my friend, Rachel, told me once.  She had a plot in a community garden in Nashville and spent a lot of time at her plot pulling weeds.  One Sunday, Rachel and her husband were in church and the preacher was talking about weeding as a metaphor for simplifying your life, how plants require water and light and can miss out on those things if they are cluttered by weeds.  Suddenly, Rachel’s husband turned to her and said, “Oh, now I get why you spend so much time weeding in the garden!”  He thought she was just doing it to keep the garden looking neat and tidy, not realizing how weeding helps your vegetables get all the light and water they require.  I’m sure it can look like a tedious job to the non-gardener, but weeding is an essential part of keeping your vegetables happy and healthy.


On the other hand, weeds can actually serve a purpose in your garden.  Whenever you have bare soil, weeds are sure to pop up within a few days.  Their seeds are ubiquitous in the environment.  They float in on the air, are carried into or buried in the garden by animals, and are dropped from parent plants around the edges of your garden.  They can live for years in the soil, just waiting for the right conditions to germinate.  You don’t have to do anything and they just grow up on their own.  That can be nice sometimes.  Without the root systems of weeds, bare soil will wash away in a strong rainstorm.  The roots of weeds also harbor bacteria, fungus, protozoa, nematodes, and other microorganisms that help to feed the roots of vegetables in your garden.  Weeds can also help keep the soil moist by trapping water between the surface of the soil and their leaves.  I have seen super dry bare soil after a hot week without rain, but if you look under a squash plant with weeds around it, the soil is still moist!


One of my farmer mentors, Bob, didn’t like calling them weeds.  Instead, he called them “nature’s support” because he saw them as free helpers.  He didn’t have to plant them, they just came up on their own, helped keep soil in place, helped keep the soil microorganisms happy, kept the soil moist, and generally added biomass to the garden that would eventually compost down into free soil!  Acknowledging that weeds can sometimes grow faster than vegetables and get the edge on sucking up water and sunlight, he would have us do a little “competition control” and that meant cutting back or mowing down “nature’s support” plants so that our vegetables would now be winning in the competition for light and water.  Note that we never “weeded” on Bob’s farm.  I really like thinking about weeds in this way.  So often we vilify “weeds” or “pests” when really they are just trying to live like everything else in the garden, and often they do much better than the things we’re actually trying to grow.  Now that I’m a farmer, I realize that you must intervene and give your vegetables the edge if you want to be sure you can eat or have vegetables to sell at the end of the day, but that doesn’t mean that all weeds or bugs need to be eradicated from the garden.  They can still live there and contribute, just with some checks and balances from the farmer.

​Chris pulling weeds in the carrot patch in June.  The tall plants are volunteer sunflowers.  We have left them in the garden to attract beneficial pollinators.  Their long tap roots also help bring minerals and nutrients from deep in the soil to the surface.
​Chris pulling weeds in the carrot patch in June. The tall plants are volunteer sunflowers. We have left them in the garden to attract beneficial pollinators. Their long tap roots also help bring minerals and nutrients from deep in the soil to the surface.


Wasps and Washing

I wanted to give y’all a little update on last week’s discussion of cabbage moths and their caterpillars’ never-ending appetite for my cabbages and kale.  WASPS HAVE ARRIVED!  There are several species of predatory wasps that can help control cabbage moth populations in the garden.  Depending on the species of wasp, they may eat the caterpillar to feed to their wasp babies, or they may lay eggs on the caterpillar, then the wasp larvae emerge and consume the caterpillar.  This past week, I have noticed quite a few wasps flying around the cabbage patch.  Upon closer examination, they were crawling around, looking for and consuming cabbage moth caterpillars.  Nature at work!  Chris and I have seen fewer caterpillars this week, perhaps due to increased wasp dining, but also perhaps due to the rainy weather, which keeps the moths (actually, they’re really butterflies) from flying around and laying their eggs on my brassica plants (kale, brussels sprouts, cabbage, cauliflower, broccoli, collards).  Either way, the caterpillar damage seems to be less at the moment, and I’m glad that I have wasps around the garden helping out!

A wasp consuming a cabbage moth caterpillar on a brussels sprout plant.  You'll notice all the holes that the caterpillar has munched out of the leaves, stunting the plant's growth.  Eat away, our little wasp friend!
A wasp consuming a cabbage moth caterpillar on a brussels sprout plant. You’ll notice all the holes that the caterpillar has munched out of the leaves, stunting the plant’s growth. Eat away, our little wasp friend!
Today, my mom, dad, and their friend, Ric, came down to the farm to help out.  I’ve had a new car canopy sitting in it’s box in my living room for the last couple of weeks, intending to put it up over the area where I wash vegetables, but unable to find the time to actually put the thing together.  While I was out picking veggies for Sunday’s market, my parents and Ric put together the canopy and re-arranged the wash station so that I now have everything under the cover of the canopy.  This will be so helpful for keeping everything shaded and free from tree debris and rogue bird poo.

The wash station now has a canopy to help keep us and the vegetables shaded!

​Another view of the wash station, including a spray table (on the right), the bath tub wash bin (on the left, far side), and a drip table (on the left, near side) where clean totes and vegetables drip dry before going in the cooler.

Chris and I do most of our vegetable picking in the morning when the plants are cool(er) and moist.  Once the veggies heat up, they respire faster, which leads to wilting.  We want the vegetables we sell at market to look nice and perky and to last longer in your refrigerator, so it’s imperative to get them out of the field in the morning when their respiration rate is lower.  Once they are picked, almost all the veggies get sprayed off by the hose on a wire mesh spray table or dunked in water to remove dirt from the field.  My dad helped me construct an elevated stand that holds a bath tub that I can fill with water for cleaning the vegetables.  The dirty water is easily drained out of the bottom of the tub, then it gets cleaned and sanitized before the next round of vegetables comes in to be cleaned.  Once the vegetables are rinsed, they are organized in plastic totes and placed into our awesome veggie cooler trailer and kept at 39-40 degrees F until they go to market.  I have several bottles of water that I freeze before the market, then place inside the totes once we open them at the market.  That helps hold the vegetables at a cool temperature inside the totes for the 3-4 hours we’re at the market.  Keeping the veggies fresh and clean looking is definitely time and energy consuming, but I think the end result is worth it – several customers have told me how long their Dark Wood Farm vegetables last.  Even though Chris, my mom, and I spend a lot of time cleaning the vegetables, I always suggest that you wash again at home.  We don’t use any sprays or dangerous chemicals on your veggies, so you don’t need to worry about that.  However, an extra rinse with cool water will help remove extra dirt that didn’t come off in the first rinse and help alleviate any wilting that happens during the time between buying the vegetables and getting them in your fridge.

Bugs!

Bugs!  A sign that summer is here is the amazing diversity of insects flying around the farm.  I’m anti-spraying, so the good, bad, and ugly insects have taken up residence at Dark Wood Farm.  So far, I haven’t had to deal with much insect damage on the vegetables aside from flea beetles on my early radish, turnip, and mustard crops and some leaf miner damage to salad ingredients.  I was able to mitigate some of the damage from these insects by using fabric row covers over the plants.  This time of year, though, the fabric row covers can make the plants and soil too hot, so I’ve quit using them except for over my eggplants.  Eggplants like heat, and they are a favorite food for lots of insects, mainly the eggplant flea beetle which turns eggplant leaves into swiss cheese in no time.  The eggplants don’t like to be abraded by the fabric, so my dad constructed some wire hoops that Chris and I put over the freshly transplanted eggplants with the help of our workshare friend, Lisa.  Now the eggplants are growing safe and sound under their little fabric hoophouse.

Chris and Lisa show off the fabric-covered hoops over the eggplants.  This helps keep eggplant flea beetles off of the plants and gives the eggplants room to grow under the hoops.
Chris and Lisa show off the fabric-covered hoops over the eggplants. This helps keep eggplant flea beetles off of the plants and gives the eggplants room to grow under the hoops.

Lately, though, I have been wringing my hands as I see a new set of insects emerging.  I’ve spotted my first few Colorado Potato beetles, known to defoliate potato leaves, and Japanese beetles, which eat just about every type of plant that I grow.  By far, the insect causing me the most concern at the moment is the cabbage moth.  This seemingly innocuous looking white butterfly (yes, it’s a butterfly and not a moth even though it’s called a cabbage moth) flits around my field looking to lay its eggs on any member of the brassica family it can find.  This includes cabbages, kale, collards, kohlrabi, brussels sprouts, broccoli, and cauliflower.  The eggs hatch into tiny little green caterpillars that eat their way through the leaves of the plants where they were born before they pupate and emerge as an adult butterfly.  If you’ve ever found a little green “worm” on your kale or in a head of broccoli, this is the culprit!  I knew I’d have some of these little guys on my brassicas, and given my 50% for humans, 50% for nature philosophy, I planted extra.  My thought was, the cabbage moth caterpillars can eat some of the plants, and I’ll just harvest the nice looking, undamaged plants to take to the market.
​The brassica patch - full of cabbages, kale, collards, broccoli, cauliflower and more.  Some will get eaten by humans, some will get eaten by insects.
​The brassica patch – full of cabbages, kale, collards, broccoli, cauliflower and more. Some will get eaten by humans, some will get eaten by insects.
So far, my “plant extra” philosophy has worked, but now the problem is that the cabbage moth caterpillars are everywhere!  Really nice looking kale plants have little caterpillars hanging out on the leaves.  Beautiful broccoli heads have little caterpillars hiding inside them.  What to do?!  I realize that most people don’t enjoy finding insects on their food, so I’m in a bit of a conundrum.  I cannot guarantee that the vegetables I’m picking right now are bug-free.  Any time I see an insect on my vegetables, I pick it off.  I also vigorously rinse my vegetables before they come to market, which removes insect hitchhikers.  But the truth is, that if you looked close enough, especially with the help of a microscope, you would probably find some kind of insect on the vegetables that I sell at market.  Now, take a deep breath and ask yourself how you feel about that.  Does it gross you out?  I know I hated finding cabbage moth caterpillars on the kale I would eat from my family garden when I was a little kid.  Since then, I’ve changed my mind about finding bugs on my vegetables.  I’ve changed my mind because I know that it is impossible to grow totally insect-free vegetables without sprays.  Whether it’s chemical sprays used in conventional agriculture, or even “organically accepted” insecticides like Bt (Bacillus thuriniensis) or spinosad, these products were developed to kill insects.  While I don’t like some insects that are hanging out on my farm and eating my vegetables, I really like some of the others and don’t want to kill them.  I have honeybees, praying mantises, ladybugs, and all kinds of other insects doing wonderful things like making honey, eating “bad” bugs, and pollinating my fruit and vegetable plants.  Whether I like these insects or not, they are all part of a larger food web that is alive and robust on my farm.  Take one piece of the web out, and there are bound to be unforeseen consequences.  Also, what the heck is in those sprays and what do they do to your body if you ingest them?  I mean, even the “organic” insecticides are made from bacteria in higher concentrations than you’d ever find in nature or they are some sort of engineered extract from bacteria or fungus.  I figure, if I am afraid to put the insecticide directly in my mouth, I better not put it on the food I’m going to put directly in my mouth.  The result of not using sprays, however, is that my kale *might* have a cabbage moth caterpillar on it when you buy it at the market.  My collard leaves might have a few holes in them where a bug took a bite.  Here’s the thing – eating a leaf with a hole in it will not adversely affect your health.  Accidentally eating a cabbage moth caterpillar won’t adversely affect your health either.  In fact, it’ll give you a little extra protein!  The thing is, I don’t know what eating kale with insecticide on it is going to do to your health.  I also don’t know what that insecticide will do to the health of the beneficial insects that live on my farm, and all the other creatures that eat those insects.  So, I choose not to spray anything and let the bugs work it out among themselves while I keep myself busy inspecting kale leaves and pinching all the little green cabbage moth caterpillars I can find.
Bug holes on an insecticide-free collard green leaf.

Fridges and Fathers

In honor of Father’s Day, I want to share with you one of the many projects my dad has been working on for the farm – the refrigerated trailer.  When I moved onto the farm in January, I knew I was going to need some sort of refrigeration for the vegetables.  The summers here get hot and a lot of the vegetables I am growing need to stay cool (down to around 41F) for up to 24 hours before they go to the farmers market.  I looked into buying a used large-sized commercial refrigerator, but I don’t have an obvious place to put it where it can be plugged in.  The barn would work well because it’s covered, but it doesn’t have power, so that was a no-go.  There’s limited covered space around the house, and I was worried about a refrigerator sitting outside and getting wet from the rain and the snow.  With that option out, I immediately thought about walk-in coolers.  Lots of farms use them, and the farm where I worked outside of Seattle, Local Roots Farm, even had a walk-in cooler that was powered by an air conditioner instead of a compressor.  This is an energy-saving option made possible by a little device called a CoolBot that tricks the air conditioner to run at temperatures lower than normally possible.  The only problem is that I am renting the farm and don’t plan to be here forever, so it doesn’t make a whole lot of sense to install a walk-in.

That’s where the refrigerated trailer comes in.  While poking around on Craiglist looking for farm equipment, I came across an ad for a “Veggie Trailer.”  It was an insulated 6’x12′ trailer that contained an air conditioning unit inside.  The guy who had built it had used it to cool vegetables to take to market, but he was getting out of the vegetable growing business and wanted to sell it.  Here was an option that worked for me!  The trailer could be pulled up by my house where the air conditioner could be plugged in, it was weather proof and water tight, and could travel with me when I move off this farm onto my own property.  So, I bought the trailer and my dad and I hauled it home to the farm, and I started using it to store and cool my vegetables overnight before I’d take them to the market.  The only problem was that the air conditioner could only cool the trailer down to about 55F at best, and on warm days, it struggled to get below 70F.  That didn’t really help much with my veggie cooling issue, so I had to keep everything inside the trailer iced down to keep them cool enough.  But what about the CoolBot?!  I knew a CoolBot would help solve my problem, but unfortunately, the air conditioning unit inside my trailer wasn’t compatible with the CoolBot.  My dad found a used air conditioner that would work with the CoolBot, and this past week, after he retired for the second time, he spent several days installing the new air conditioner, adding extra insulation to the trailer, and hooking up the CoolBot.  The final version of my refrigerated veggie trailer is awesome, and it’s now sitting out in the shade under a big sycamore tree next to my house waiting to be put to use.  We had to work out some electrical issues over the last few days, but everything is up and running and the CoolBot-powered air conditioner is cooling the inside of the trailer from ambient temperature down to 40 degrees in less than 15 minutes, which is amazing!!!  I am so excited to put the trailer to use, and can’t thank my handy dad enough for doing all the hard work, especially since he’s retired (again).

​Here she is, the refrigerated veggie trailer, sitting outside my house in the shade.  In case you were wondering, it came with the air-brushed license plate and NRA sticker.
​Here she is, the refrigerated veggie trailer, sitting outside my house in the shade. In case you were wondering, it came with the air-brushed license plate and NRA sticker.
​Here's the air conditioning unit that dad installed.  He attached it securely to the tongue so it can travel.
​Here’s the air conditioning unit that dad installed. He attached it securely to the tongue so it can travel.
This is the inside of the trailer, complete with insulation, air conditioner, and CoolBot.
The trailer already had blue foam insulation on the walls and doors.  Dad added extra insulation to the floor so that the sinking cold air won't leak out of the bottom of the trailer.
The trailer already had blue foam insulation on the walls and doors. Dad added extra insulation to the floor so that the sinking cold air won’t leak out of the bottom of the trailer.
The CoolBot is super snazzy and awesome.  It tricks the air conditioner into running below it's lowest thermostat setting.
The CoolBot is super snazzy and awesome. It tricks the air conditioner into running below it’s lowest thermostat setting.


Water

Water has been on my mind lately.  Mainly because I was worried that my plants weren’t getting enough of it during the final weeks of May.  Until a few days ago, the top few inches of soil in the garden were turning dusty dry and the flow of the creeks running alongside my garden had turned from a gush into a trickle.  While neighboring farms were busy irrigating their crops, I was busy doing a rain dance because…full disclosure here…I don’t have an irrigation system set up yet.  I have a long to-do list for the farm, and setting up irrigation has been on that to-do list for a long time.  I kept shuffling it to the bottom of the list because Mother Nature has been providing consistent rain or thundershowers (or snow) since my first seeds and plant babies went out into the field in March.  So instead of looking my irrigation (or lack of irrigation) problem in the eye, I focused on other farm projects.  Also, I have to admit, irrigation is a topic that makes my head spin, which is probably why I have procrastinated so long.


To irrigate crops, you need a water source and power to deliver the water to the crops.  While I’m lucky that I have creeks bordering three sides of my farm, they don’t always hold water consistently throughout the year, and I don’t have an electric source anywhere near my field, so I need to have an alternative power source to pump water from the creeks.  Another disclosure –  I would rather not have to water at all.  If I can get all of my water in the form of rain, it saves me a lot of time and worry.  Plus, plants tend to be better at growing deep, water-seeking roots if you don’t water them too much.  If the surface of the soil is consistently wet from regular irrigation, the plants will form shallow roots that stay near the surface and easily dry out when they aren’t irrigated.  Normally, here in Kentucky, you can bet on warm rains throughout the summer, but we have experienced drought years, and who knows what will happen this summer, so I’m biting the bullet and buying irrigation equipment in case we have an unusually dry summer.  Now I’m tackling the confusing-to-me subjects of water pressure, friction loss, filtration, and the puzzle of putting together pumps, fittings, pipes, hoses, valves, and nozzles.  On top of all that, I have struggled to find a local irrigation supply store that carries agricultural irrigation products for small scale growers.  There sure do seem to be a lot of lawn irrigation contractors and suppliers out there, but not a lot of options for people growing things other than grass.  The nearest agricultural irrigation store I could find was in Lexington. I could try and order everything online, but I really wanted to talk to an expert and see how all those little fittings, hoses, and whoozeewhatsits go together before I purchased them.  So, earlier this week after some hot days with no rain, I decided to drive to Lexington and talk to the fine people at Kentucky Irrigation.  Now I’m the proud owner of some drip tape, a filter, pressure regulator, and various fittings.  I still need to purchase a pump and a large diameter hose or pipes to deliver water from the pump up the field, but all of that can wait a little longer because my rain dance paid off – on Wednesday, we received an inch of rain.  As luck might have it, most of it fell during the few hours we have to harvest vegetables for our Wednesday farmers market, but I’m not complaining.  The plants are thriving now in moist soil and I get to procrastinate my irrigation problem for a little longer.

Happy helpers washing vegetables in Wednesday's rainstorm
Happy helpers washing vegetables in Wednesday’s rainstorm

Transplant ’til you drop!

Now that June is right around the corner, the farm is transitioning from spring to summer vegetables, and I thought it might be fun to share what we’ve been planting in the ground over the last couple of weeks.  Before I go through the list, let me describe the planting process.  Some of the vegetables that I grow come straight from seeds planted out in the field.  All the wonderful items in the spring salad mix, for example, were planted out as seeds.  First I till the ground, then I make a furrow (kind of like a tiny ditch), then I sprinkle seeds along the furrow, cover the seeds up with dirt, and then pray for rain.  Seeds need water and they need to be within a favorable temperature range to germinate.  Some of my seeds have germinated well, especially all those salad-y things.  Other seeds have not, like spinach.  Sometimes, germination is helped along by putting fabric row covers over the seeded area because it helps keep the soil more warm and moist.  Sometimes this helps the weed seeds germinate too and the new baby weeds choke out the little plants that I want to grow.  You win some, you lose some.


 ​Here's what baby chard looks like while it's living in the greenhouse, waiting to be transplanted out to the field.

​Here’s what baby chard looks like while it’s living in the greenhouse, waiting to be transplanted out to the field.

Transplanted plants, on the other hand, can be planted in the freshly worked ground and will be leaps and bounds ahead of weed seeds.  Because they are big, they can also resist insect or other pest damage, which is a plus.  The drawback, though, is that transplants need a lot of TLC to get them big enough to put out in the field.  You have to sow them as seeds into potting soil in a flat.  A lot of growers buy their potting soil, which is often “sterile,” meaning that it is guaranteed to be free from fungal and bacterial diseases.  I have chosen not to buy pre-mixed potting soil and have been mixing my own blend of compost, peat moss, dolomite lime (a natural source of calcium and magnesium), and worm castings (that’s right, worm poo).  It has taken some tweaking of how much of each ingredient goes into the mix, but I’m pretty happy with the result.  I am actually glad that my potting soil isn’t sterile because it helps the plants develop strong immune systems and eliminates any little plants that aren’t going to make it out in that big, dirty, non-sterile world.  As a side note, all the ingredients I use come from organic sources, which means I pay higher prices, but I do so willingly because I prefer to use all natural products.  Most of the potting soil you buy from the store is not organic because it contains synthetic fertilizers and/or synthetic wetting agents that help keep the soil moist.  After the seeds have been sown into potting soil, they get watered on a daily basis and live in the nice, cozy greenhouse environment for anywhere from 4-12 weeks.  They often need to get “potted up” or moved into larger containers to have enough space to grow into healthy sized transplants.  Once the transplants are ready to go out in the field, I dunk them in water mixed with a tiny amount of organic liquid fertilizer made from kelp and fish.  This gives the plants a little bit of nutrients and extra water during the first few days when they experience transplant shock.  Each plant gets placed in the ground with some extra compost, and then they are watered in.  It’s a time consuming process, but my plants seem happy, so I’m not inclined to change things.  Larger farms have machinery that can do the planting, fertilizing, and watering, but my farm is small and I like the fact that each plant passes through my hands on its way from the greenhouse to the soil.  It makes me feel a little closer to the plants and helps me to notice the health of each plant.

transplanting in action
Transplanting in action! Chris plants eggplants in holes in the ground while Lisa scoops compost from the bucket of the tractor to fill the holes.

So, enough of the process, here’s what has been planted over the past two weeks: 5 varieties of cherry tomatoes, 2 varieties of roma tomatoes, 1 variety of sundried tomato, 12 varieties of heirloom tomatoes, 5 varieties of basil, rainbow chard, cumin, nasturtiums, 3 varieties of sunflowers, 3 varieties of bell peppers, 1 variety of Italian pepper, 4 varieties of hot peppers, 1 variety of eggplant, 5 varieties of cucumber, 4 varieties of watermelon, 2 varieties of cantaloupe, 2 varieties of leeks, 1 variety of shallots, and 7 varieties of onions.  Needless to say, you’ll find some tired and achy knees and backs on the farm these days, but it feels good to have all of these plants out of the greenhouse and living out in the field.  I may have gone a little overboard buying seeds of so many different varieties, but I’m excited to see which ones do the best in the soil and climate here, and also to see which ones have the best flavor.  I look forward to bringing all these goodies with me to the market later in the summer and fall, and I hope you’ll come out, give them a try, and let me know which are your favorites.

Freshly transplanted peppers and tomatoes

New Arrivals

posted in: Friendterns, General, Local Food | 0
Vyper and Smudge
Say hello to Chris and the first Dark Wood Farm animal, Smudge.

The big news on the farm this week is that help (and company!) has arrived.  My friend, Chris “Vyper” Pyper and his feline companion, Smudge, will be living and working with me here on the farm through the growing season.  And, yes, Smudge has to work too – she’s on bug killing duty in the house.  Chris and I met when we volunteered for the same AmeriCorps program in 2010.  We both led trail crews in the Pacific Northwest – me in the Gifford Pinchot National Forest in Washington State and Chris along the Pacific Crest Trail in Northern California and Southern Oregon.  We were thrown together often for trainings and special events, and when we realized we would both be moving to Seattle after AmeriCorps, we promised to stay in touch.  It wasn’t long after we both moved to Seattle that we realized it would be fun and cost-effective to be roommates, especially because we shared a love for cooking local, sustainably grown food.  Chris and I lived in a few places around Seattle, but we always had a garden, whether in the ground or in containers on our balcony.  We even converted a little shed into a chicken coop and kept four laying hens in our backyard in urban Seattle.  Aside from his full time job at the Mountaineers, Chris worked for Nash’s Organics at two of Seattle’s largest farmers markets, while I started exploring the ins and outs of farming as a volunteer at the University of Washington Farm and then as an employee at Local Roots Farm.

When I left Seattle to move home and start my farm this year, it was bittersweet.  While I was excited to return home to my family and friends in Kentucky, I was very sad to leave my wonderful friends in Seattle, especially Chris who had been an amazing roommate and friend (and Smudge wasn’t so bad either).  Now that Chris has decided to come spend his summer and early fall at Dark Wood Farm, I am overjoyed.  We have already accomplished so much during his first week here, and we are cooking some pretty amazing meals from all that the farm has to offer, with a little help from our fellow market vendors too.  So far, Chris is adapting to the humid heat of Kentucky (he grew up in the dry heat of Utah), and we both got called “city people” while hauling water from the local well today, but we are both enjoying the sunsets, listening to the birds while we work, and sharing the bounty of the farm with family, friends, and market-goers alike.

vyper at market
Less than 12 hours after he arrived, Vyper put his veggie slinging skills to work at Findlay Market.
tomato_transplants
With Vyper’s help we now have over 250 tomato plants in the ground!
1 2 3